How to make a Scrolling Tile Map without an engine in C++
Prerequisites for this tutorial
- Visual studio, here is a step by step tutorial to download it, you can get the latest version of this IDE which is 2022 at the time of writing this.
- Basic template, explained below.
- Tiled, a free software for drawing tile maps.
This tutorial but Video
I also made a video form of this tutorial:
About the template
So for my school project we had to make a simple 2D platformer. The only requirement was to use this template, which is a minimalistic framework for making 2D games in C++. Minimalistic means you can more or less write to pixels and there are some math functions.
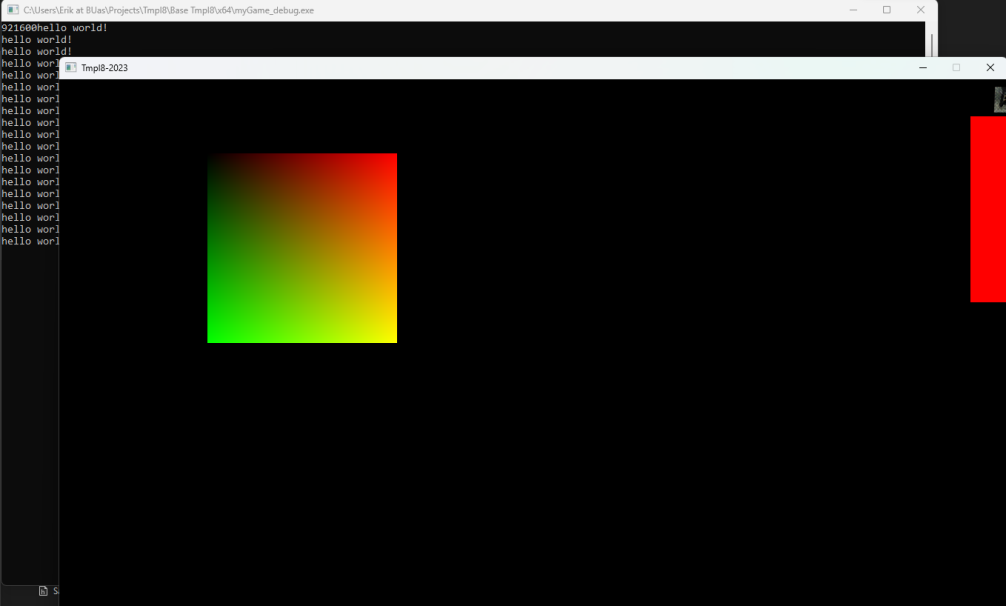
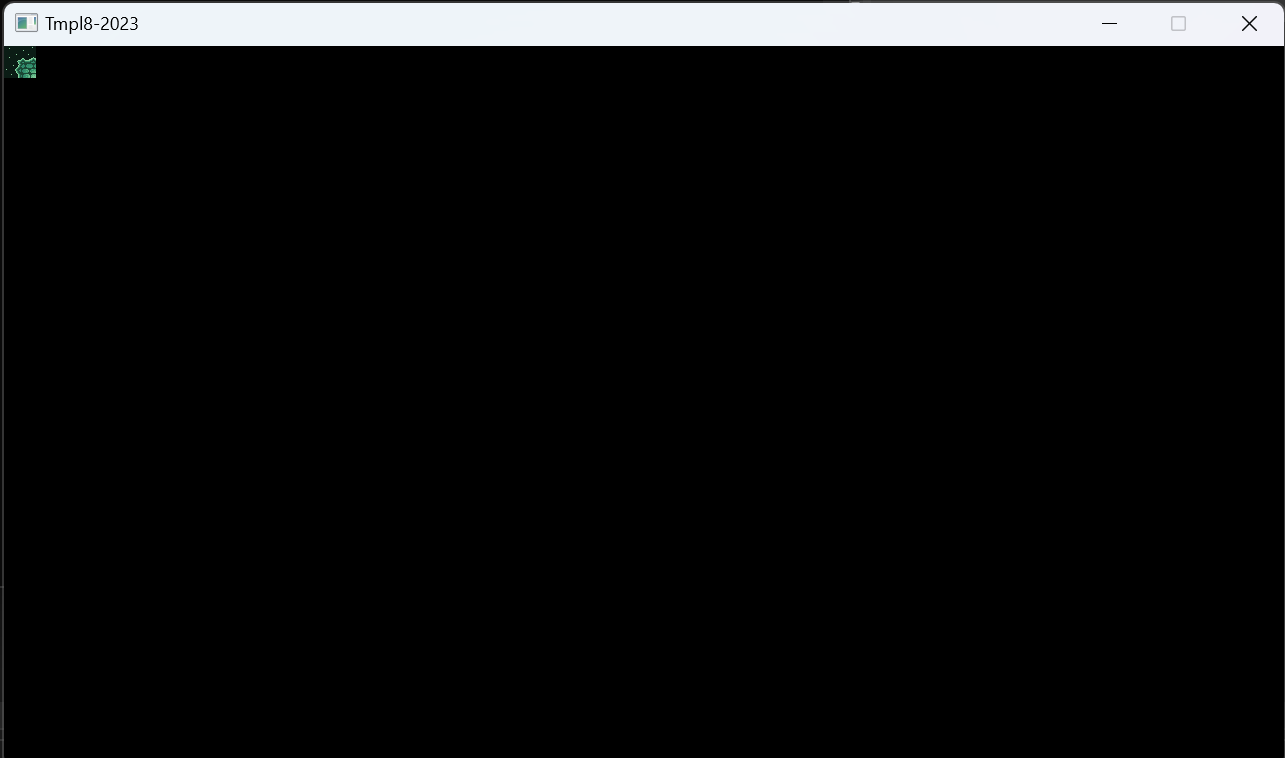
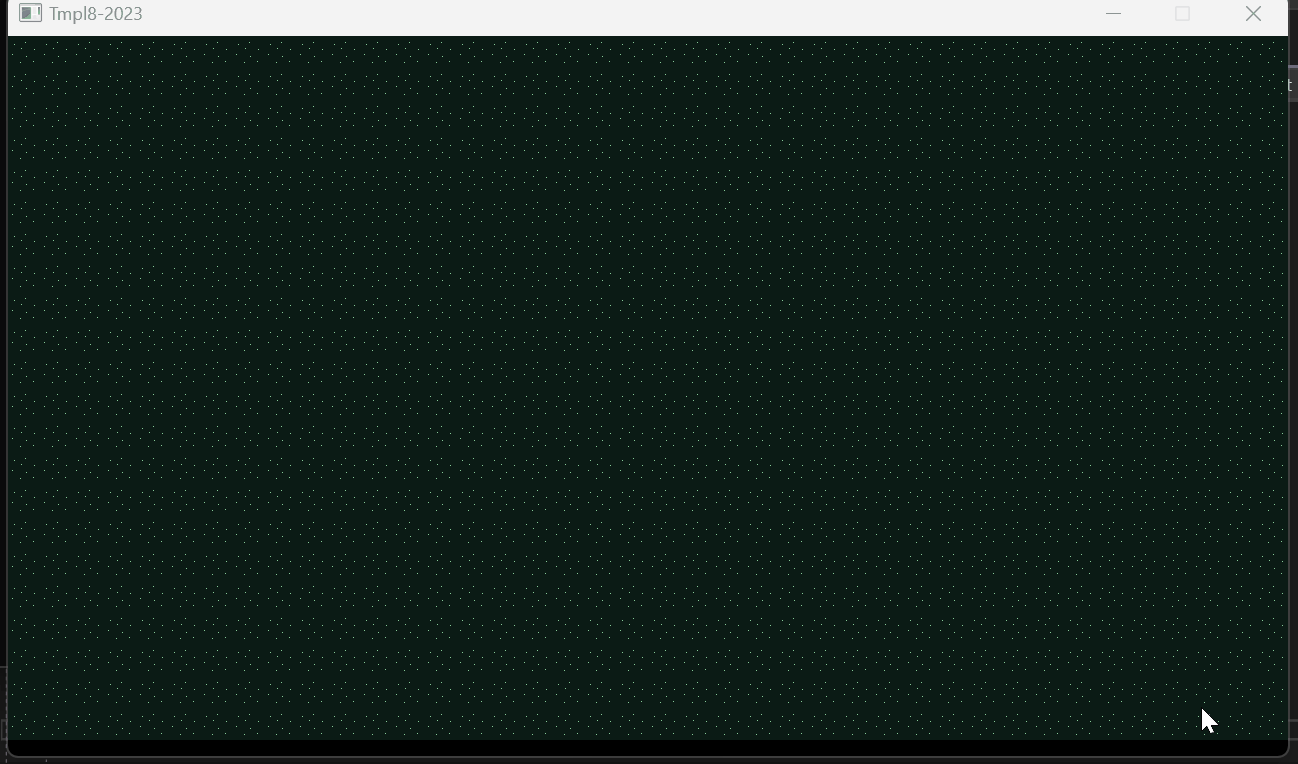
Here is how it looks when you run it the first time:
Of course not all mechanics from the project will be explained, but if you are interested in any of them let me know, and I will make specific tutorials.
Importance of making projects without an engine
So there are hundreds of engines that can help you make a game much faster, Why the hassle of not using one? Why remake most of the already established systems that are already fine-tuned to be as efficient and generic as possible?
The most important reason, for me, at least, is confidence. Remaking all this will make you confident in your abilities as a programmer.
Curiosity is another good reason. Most people use engines on a daily basis, but don’t know what is behind the abstraction. What other way is better to learn what is in a black box, by making one yourself?
You may have heard of these titiles which are made inside an in house engine:
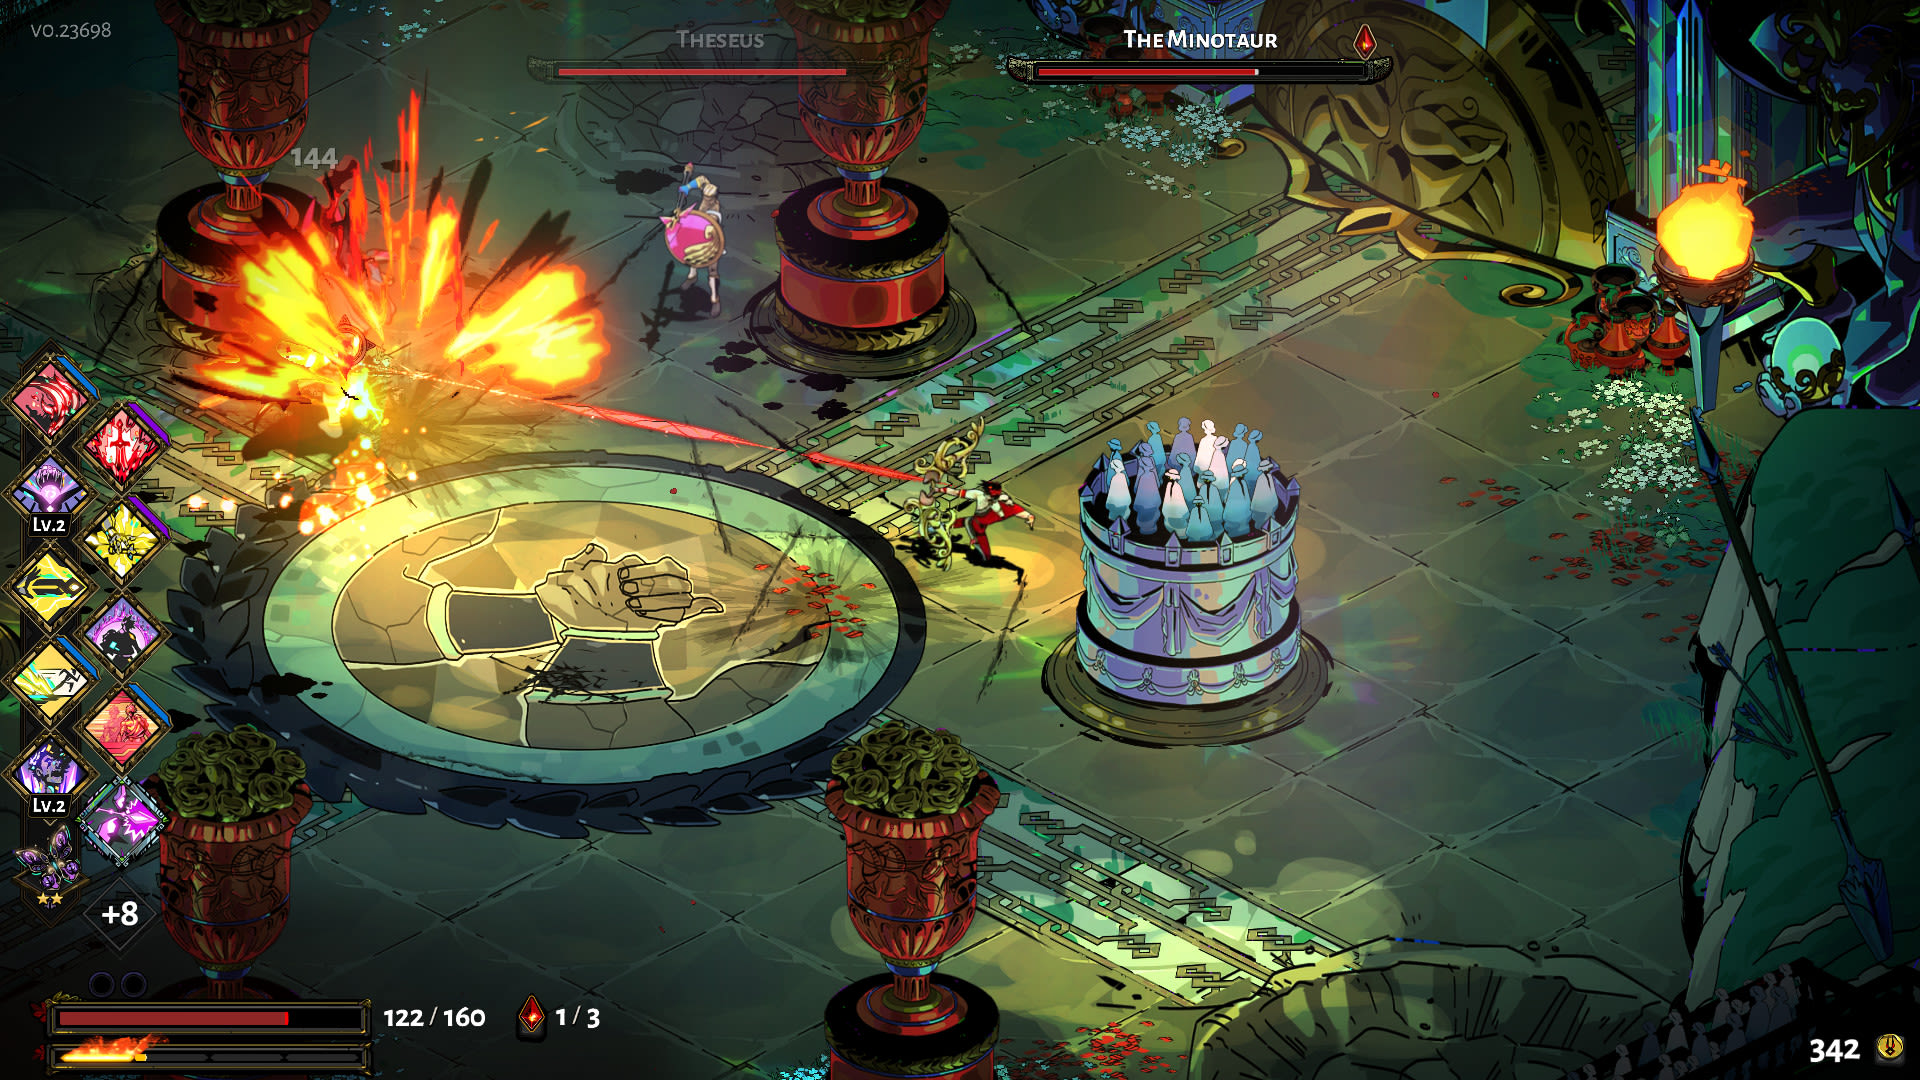
the indie game Hades
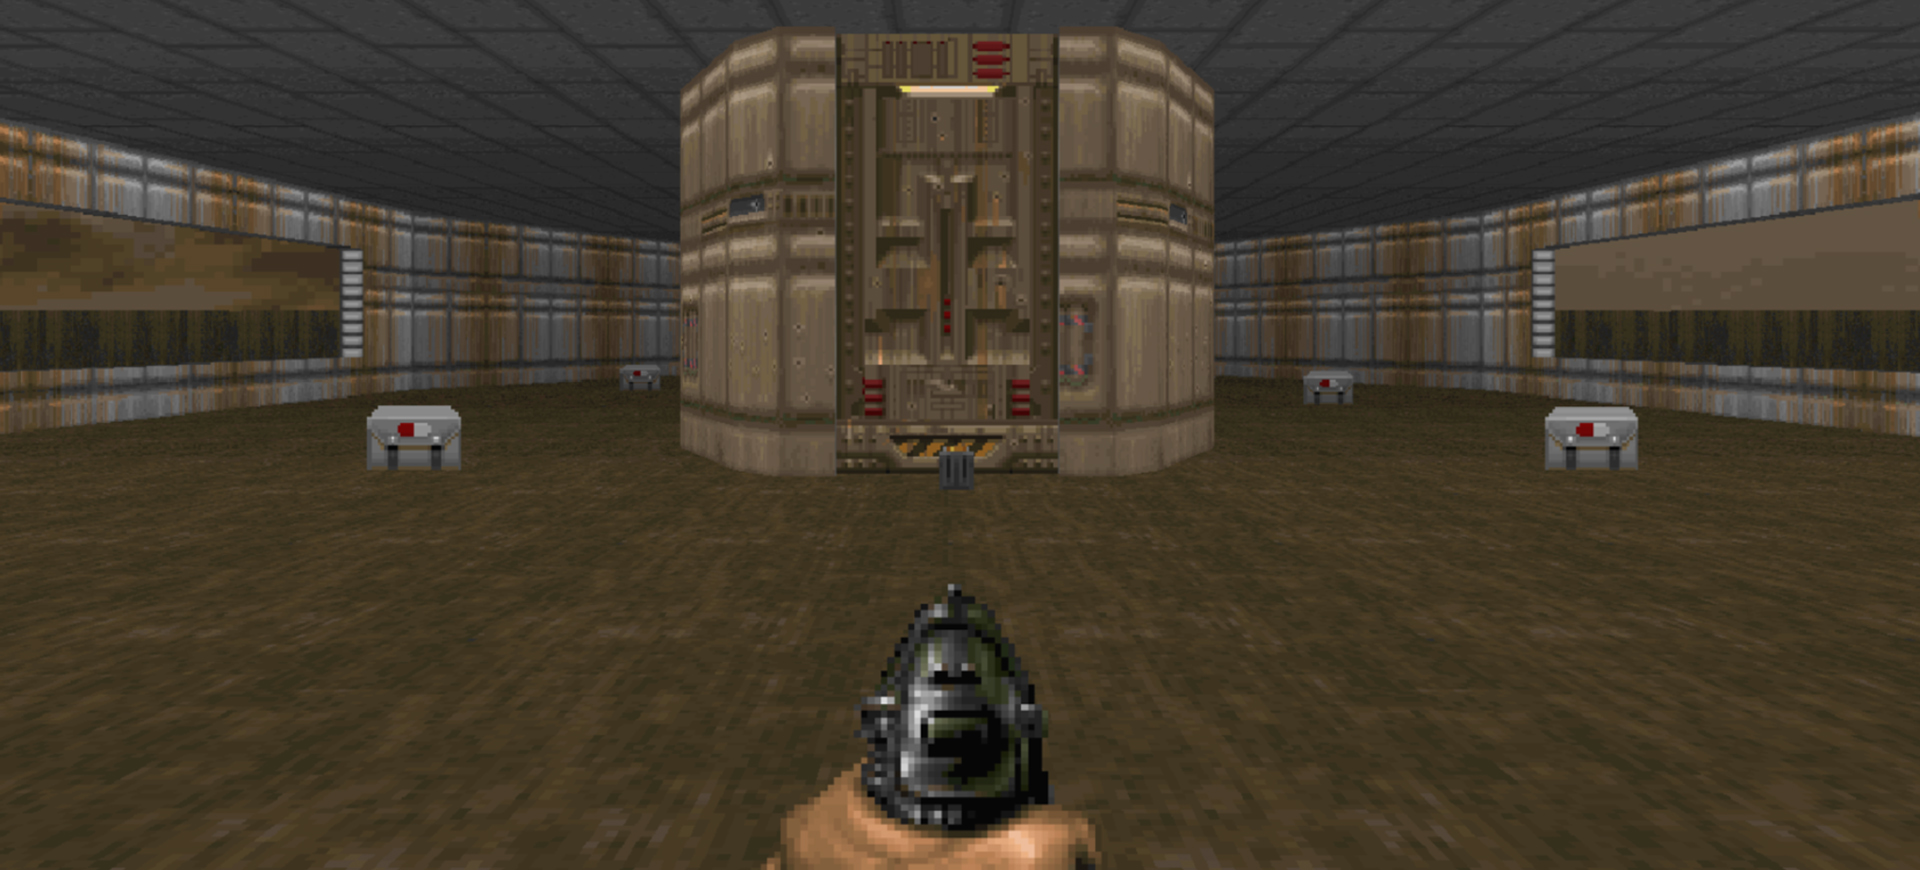
you know DOOM
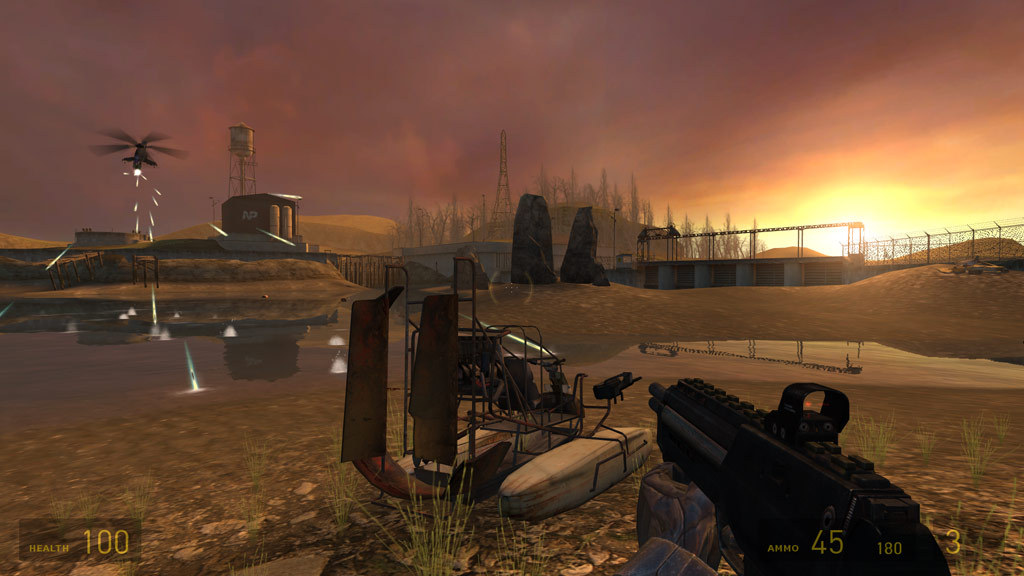
half life 2
The main idea is that some engines are
bornout of games. That’s also how Unreal Engine become the engine it is today.
And finally, to maybe break the status quo. I feel that most engines are tailored to some kind of ideal experience of games. That means they expect basic blocks of functionality that makes up a game. By building a game brick by brick, you are more likely to discover new alternative ways to create things. You can design your game with your own building blocks, not the ones that an engine provides. Basically, you can make your own engine for your own unique game.
That is what I am telling myself for starting my own grand strategy game. Don’t worry, I might finish it in the next ten
10 years.
You can read more about it on this post.
Rendering Pixels
Firstly, you probably need some way to render pixels to the screen. On that front, I’ve got you covered. Just use the good old template, I also used the same one to build my project. Go and wander through it and find yourself very confused about certain aspects of it!
Don’t worry, it might seem overwhelming at first, but everything looks that way when you are starting out. It is hard to reason about because it offers a base that you should try to modify and change to suit your needs. It is intentionally made in this way, so you can optimize it further or add new functionality, but you do get the minimum.
A window for your game, some math, a bit of utility, basic shapes to draw on the screen and the weird notion of a Sprite which we will maybe explore deeper into another tutorial.
Surface is the one we are interested in, because we need to store an image inside it.
Unfortunately for us, Surfaces do store pixels, but not in a 2D array. How it would have been trivial to understand, but a 1D array, or “pixels”.
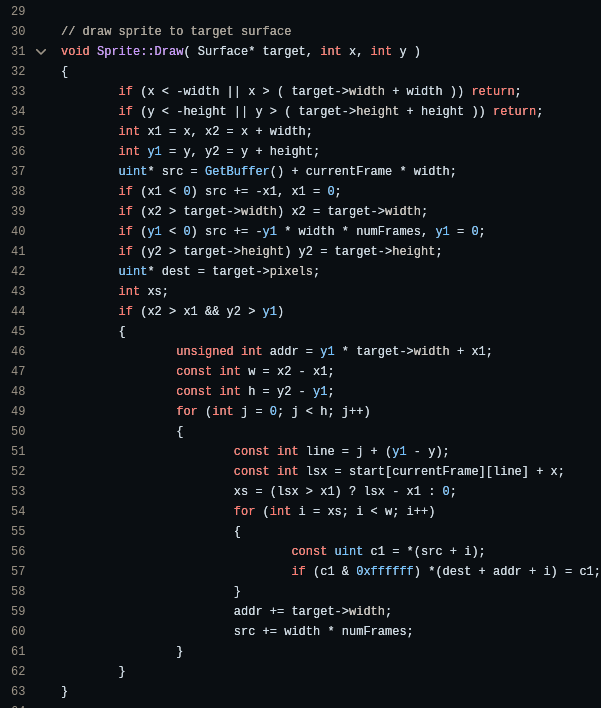
In case you did not know, a pixel is more or less an unsigned integer, every 8 bits from the right to left represent the following channels:blue, green and red, or RGB for short. I won’t get into details now, but the idea is that a pixel is just an unsigned int which we can copy easily.
I explain how to traverse the pixels of a Surface as a 2D array, here.
By the way, you don’t really have to use the stuff provided, if you don’t like the Surface class, make your own, or modify it to suit your needs.
After downloading it, you can press F5 and hopefully a hideous window is going to pop up. This is what it is so nice about this template, it just works. in case you forgot how it is supposed to look like
Drawing a tile map
A scrolling tile map, it is probably the most used gimmick since 2D games were invented 1000 years ago. The most easy way to represent a tile map is to store an array of integers that represent the index of the tile that goes there. It goes without saying, but we also need a tile palette, so we can draw each tile to its corresponding index. We could also use a convention for empty tile, like 0.
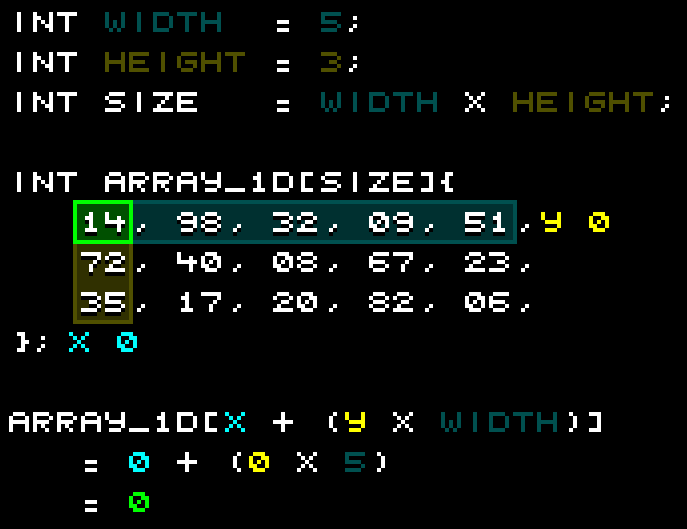
Tile map array
Our array should look something like this
Tile map on screen

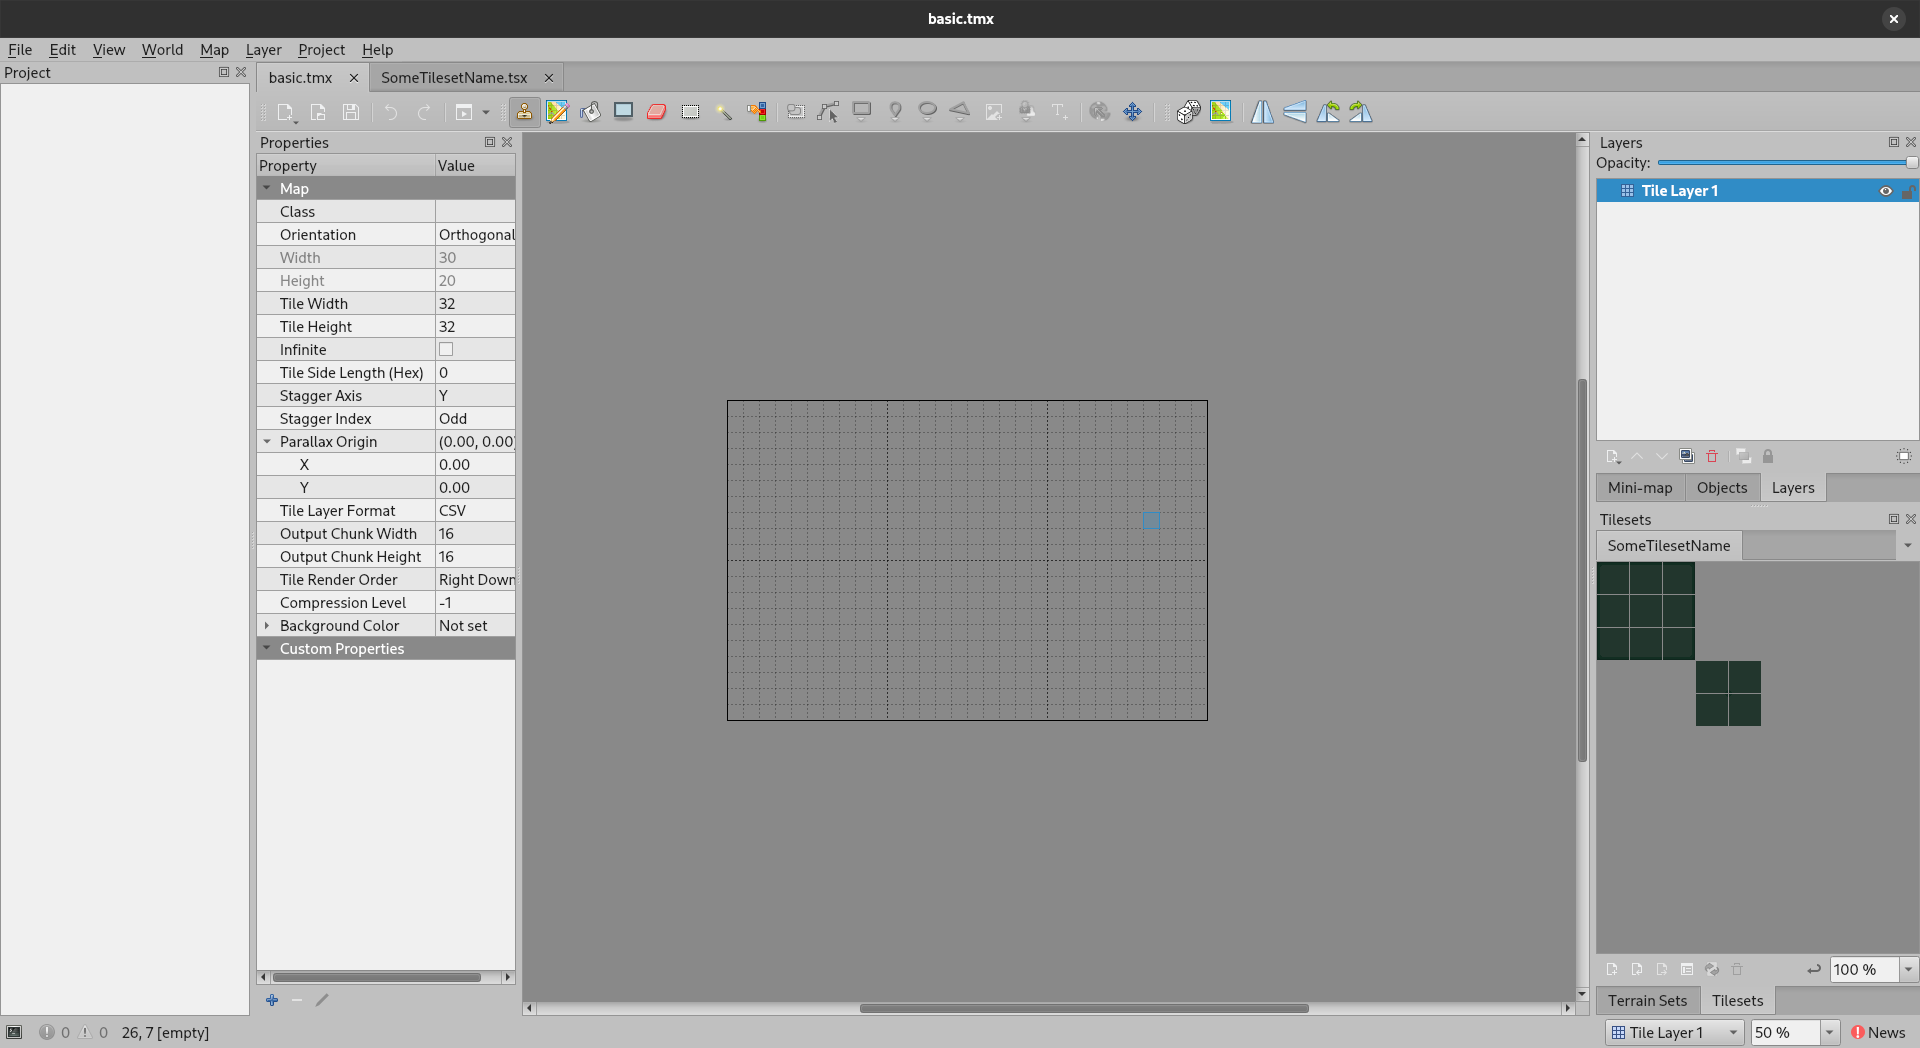
Reality is a bit more colorful Fortunately, in Tiled that is exactly what we get, a tile map that we can export as a CSV file. Better yet, the .tsmx file used for saving the file can be parsed into our game.
Open Tiled and create a new map, you can choose the size of the map, the tile size and the tileset.

Hintmaybe top left corner “File”?.
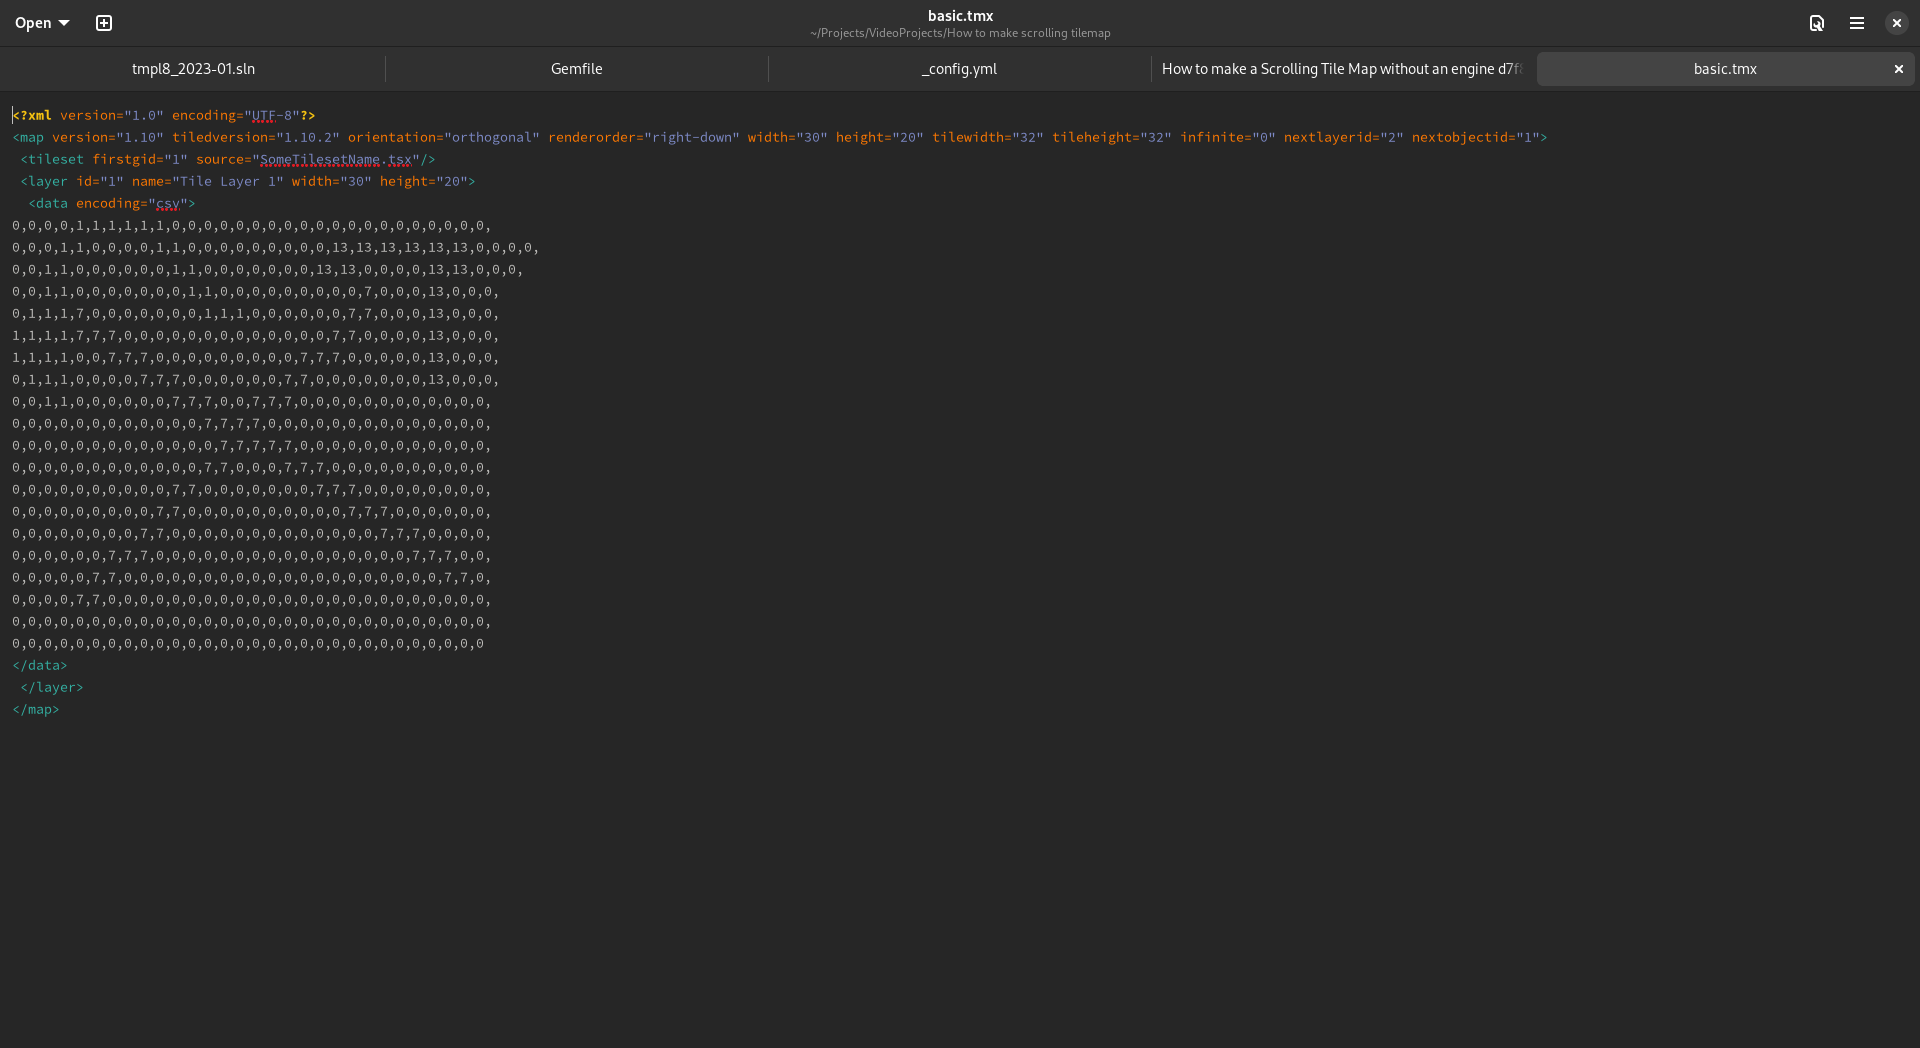
After clicking okay we are going to have a big empty tile map. This is a good time to save your file. Choose a location and a name for it and then you can see that it is saved as a .tmx file. This is the file that we are going to parse into our game. To see what it looks like from the inside, you can open it with any text editor.
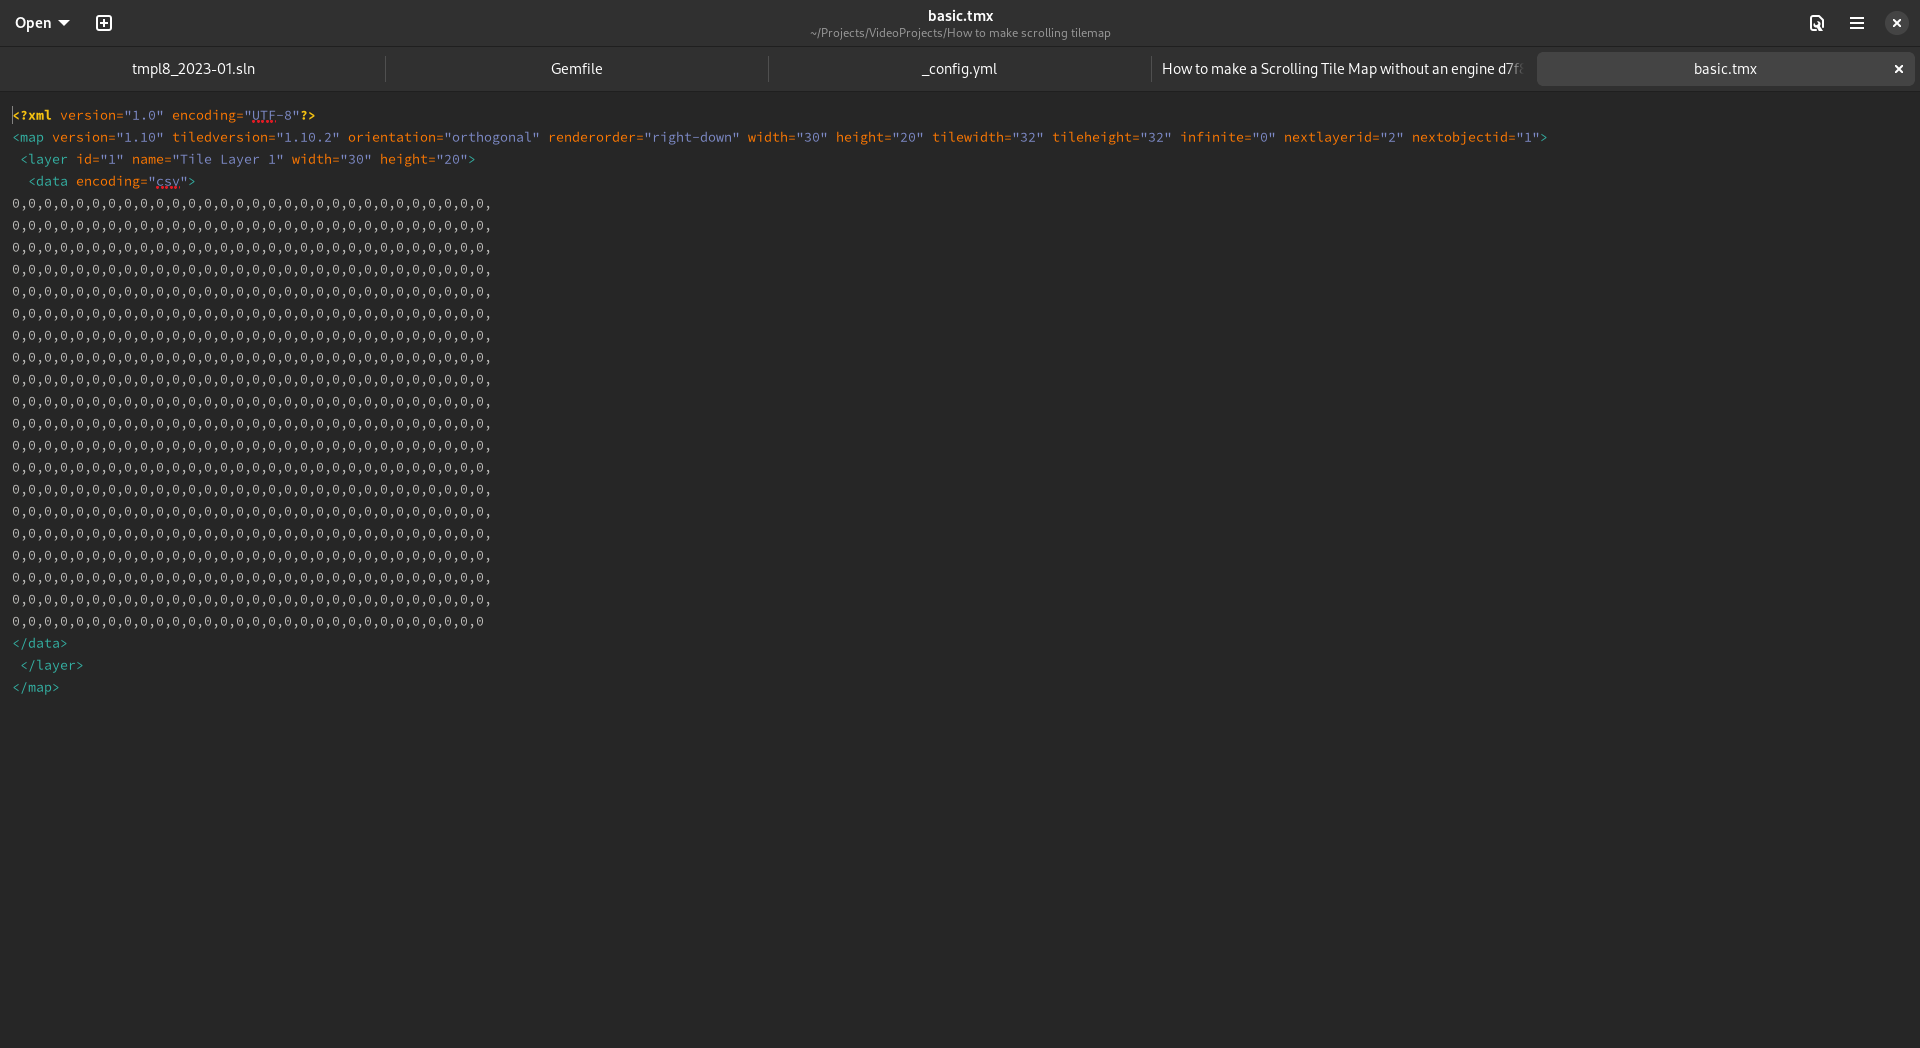
marvelous 0s
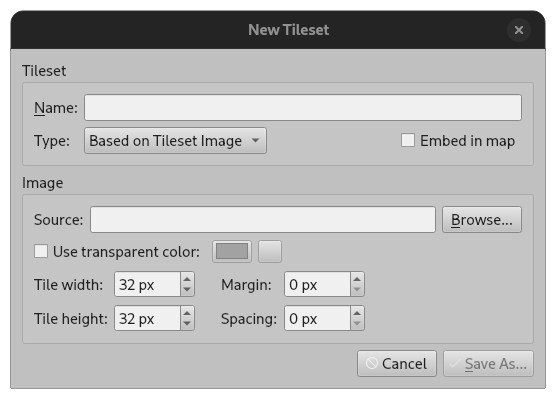
Back into Tiled I will use this free tileset (which I modified for this section so it is easier to see), link here, but you can use any tileset you want. 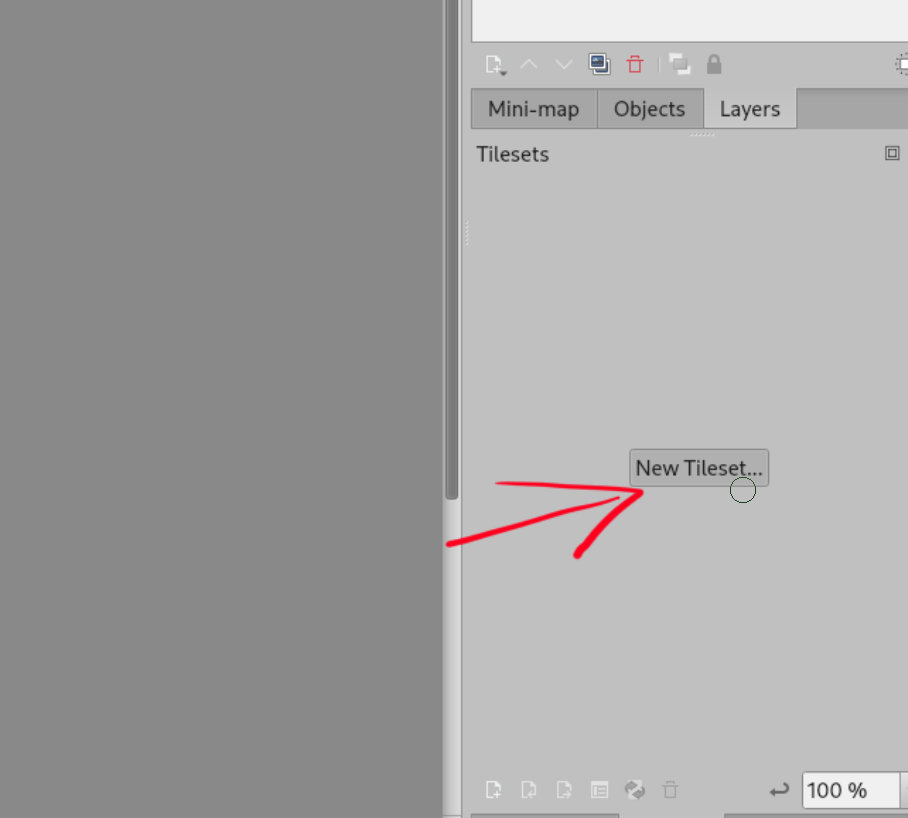
Click on the tileset button and add a new tileset, you can choose the image and the tile size. Save it somewhere and you are ready to go.
After that it should look similar to this:
Yep, that is it, you can draw a tile map.
Now, you can select a tile from the tileset and draw it to our map.
I won’t claim I am a good level designer or that I even know how to use Tiled properly, but the idea is that now we can select a tile and draw it to the map.
 I was born an artist, I know
Save, then check the file again with a text editor, you can see that the file has changed. Now we can parse this file into our game, while not having directly modify the array inside the code
 You could also just let someone who knows how to do levels…, just a thought.
Finally, we just need to parse the CSV into our array, now that task may take some time, feel free to try it, but I just happen to have a basic CSV parser from my project, link here. Keep in mind it only works for one layer, but I am sure you can modify it to support multiple layers.
 sorry for the C style strings, one of the requirements for the project was to not use strings from C++
Getting our tile map into the game
If you get stucked, or you just want to make it work, I do have a repo for this part here
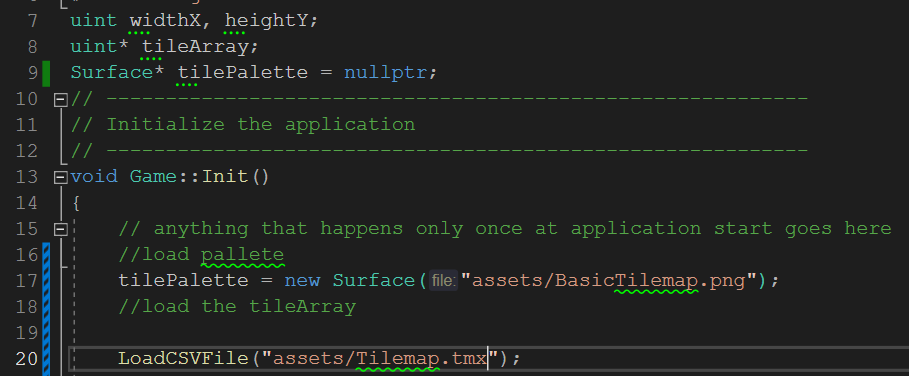
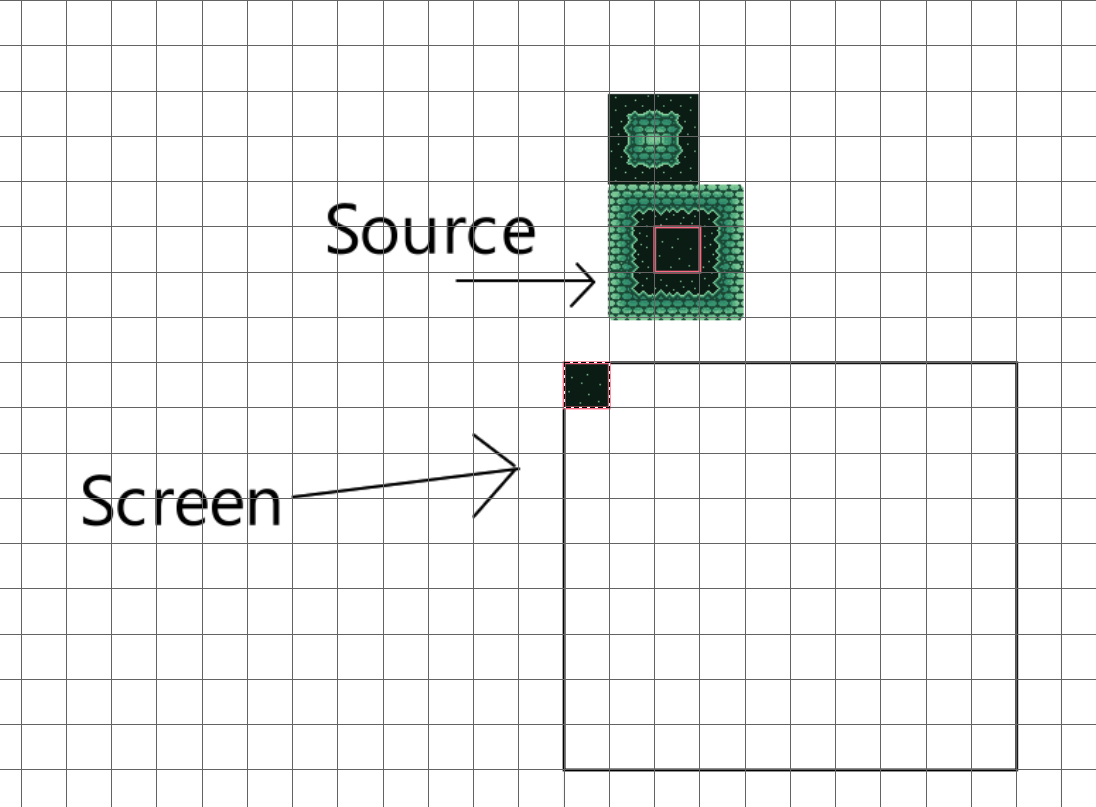
Ok, now we have to make some code that copies the tile from the palette image to the screen. The image we used earlier to draw to inside Tiled can be reused for this purpose, just be sure to use the .png file, not the one that Tiled uses to represent tile sets.
You should do something like this, before moving on to rendering.
My assets folder looks like this:

Images and our screen is made out of pixels, so we can copy from the source to the screen, or more generally, the destination.
Traversing a 1D array as a 2D one
As I said earlied, Surfaces have 1D arrays to represent pixels, aka contigious block of memory.
We can use this formula to traverse the array as it was 2D, we might want 1D arrays over 2D arrays because traversing dynamic memory is much more inefficient in 2D than 1D.

Let’s iterate a bit over this, how would the indices change:
First our mental model is a 2D array, but the actual array is a 1D one as shown below, in the gif.
When x reaches the width, y is going to increase by 1.
y * width is how we get the row and by adding x we can get the column.
Finally we can see how this formula just maps 1D space to a 2D space, in the end is just going from left to right in the one dimensional space.
My friend, Erik, provided this great animation
Note : Click on the gif so you can see his github repo
After you get your head around how this formula works, you know more or less how you can copy the value of each pixel from the palette and draw it to the corresponding screen pixel.
Let’s start small, and draw just the first tile to the screen.
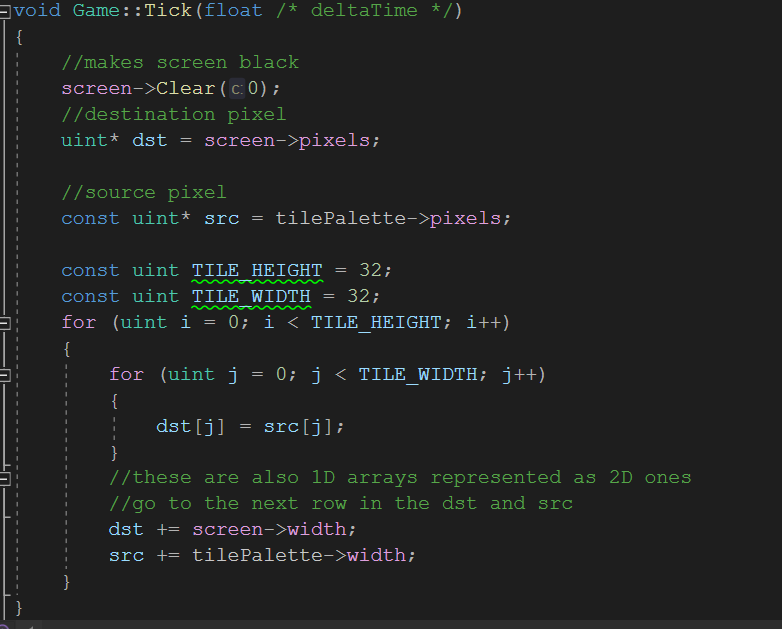
make sure you do your drawing in the tick function If you run the solution you should see a majestic tile:
 That is beautiful, isn’t it? Of course, there are already optimizations to be made, but just let’s be happy about this big step towards our own tile map draw method.
Drawing more then one tile
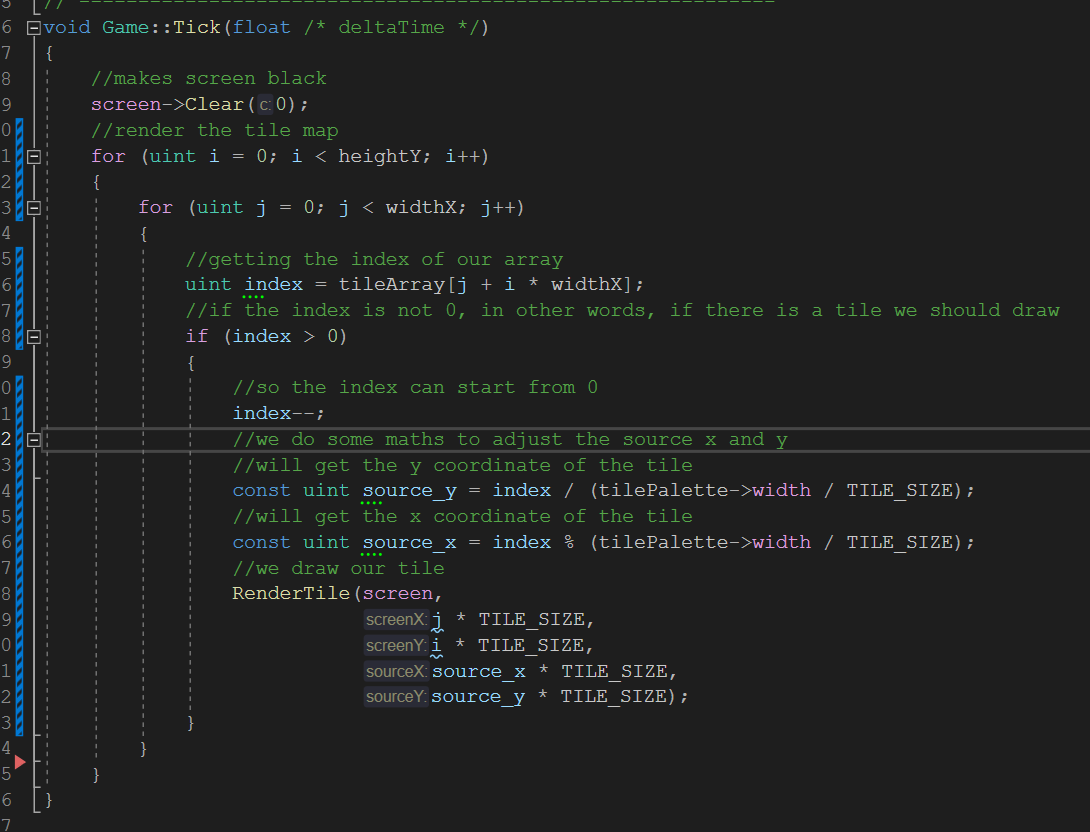
Right now we are drawing the first tile of the tile palette to the screen, but we want to draw all tiles from our tile map indices. We have to do some little adjustments to get the source of the tile we need to draw, aligned to the screen.
You might want to try this one on your own, or not, here is the rundown:
Getting the indices for our tiles
 You could get away without computing source_x and source_y if your tile palette has only one row
Drawing one tile at a time
 This is how a tile would get drawn
And now, after hard work we get the notorious error:

Access violationmeans that we tried to write somewhere outside of ourarray, orscreenin this context.
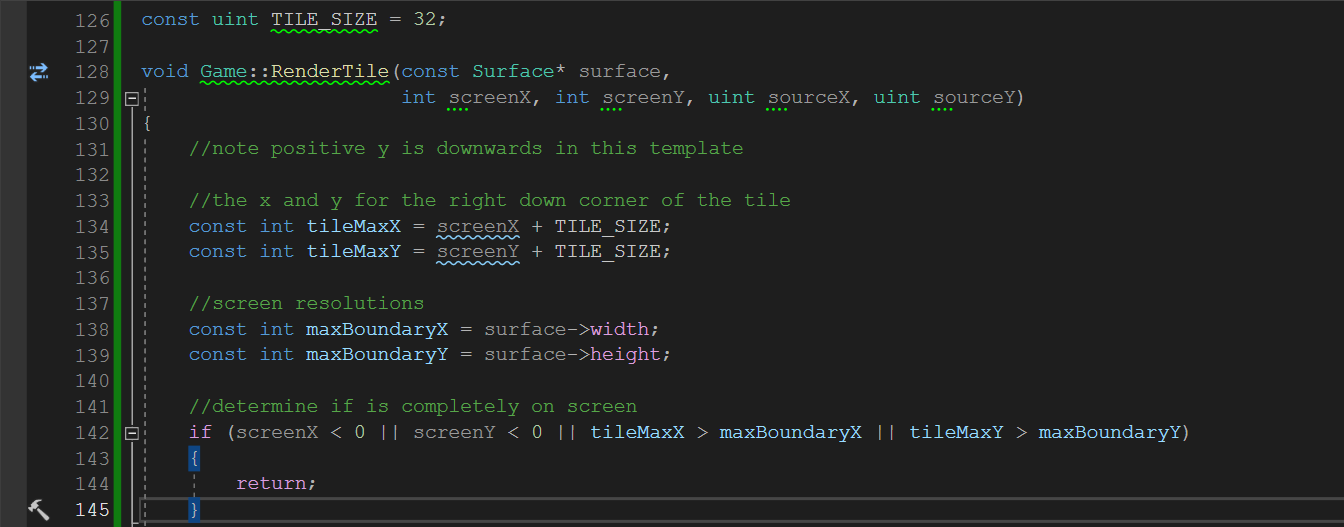
Partial Rendering of Tiles
I might have partially lied earlier about the error, you might or might not get it, depending on how big your screen and/or your tile map. Assuming you do not want to live with that compromise, we need to partially draw tiles in order not to draw outside the screen.
Let’s start simple with checking if a tile is out of screen. If the tile’s corners are between 0 and the screen resolution we can draw it.
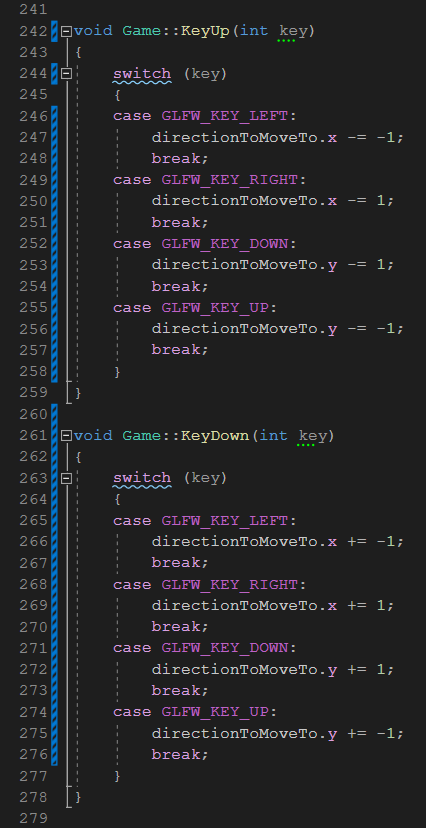
 Let’s try one more time! But, before that let’s give our tile a position and some code to move it in the opposite direction of our keys. We do this to create the illusion of movement, the map should move in the opposite direction of where we want to move.
Let’s make some vectors to store the position and the direction we need to go to:

We get the input like so:
 You also need to go to the header of the game.h and move the implementation into the .cpp file.
Moving the tile map but not a scrolling one yet
So it seems to work, but we don’t get partial tiles. We need to find a way to render tiles partially to the screen. Let’s think about the logic for one lonely tile at each corner and edge of the screen, we can observe how it clamps to the screen resolution when it is off-screen.
What is visible

What we need to clip

Adding some code to handle the clipping for every other corner case:
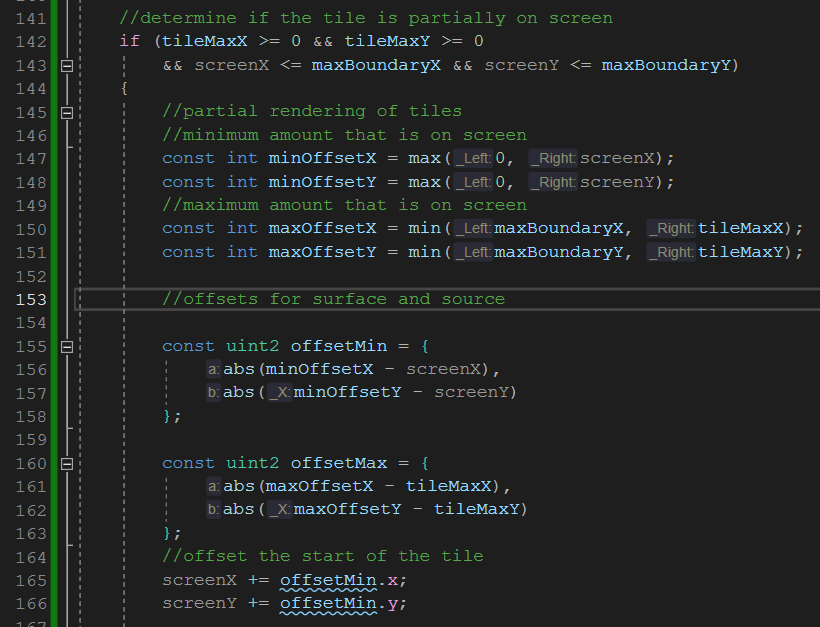
We can add the amount we clamped to the destination pixel, but then we are copying the wrong pixels! It is still as it had been if the tile was completely on-screen!

Adding this code, we handle adding the clip amount to the source: 
In this way we can draw a partial tile to the screen. 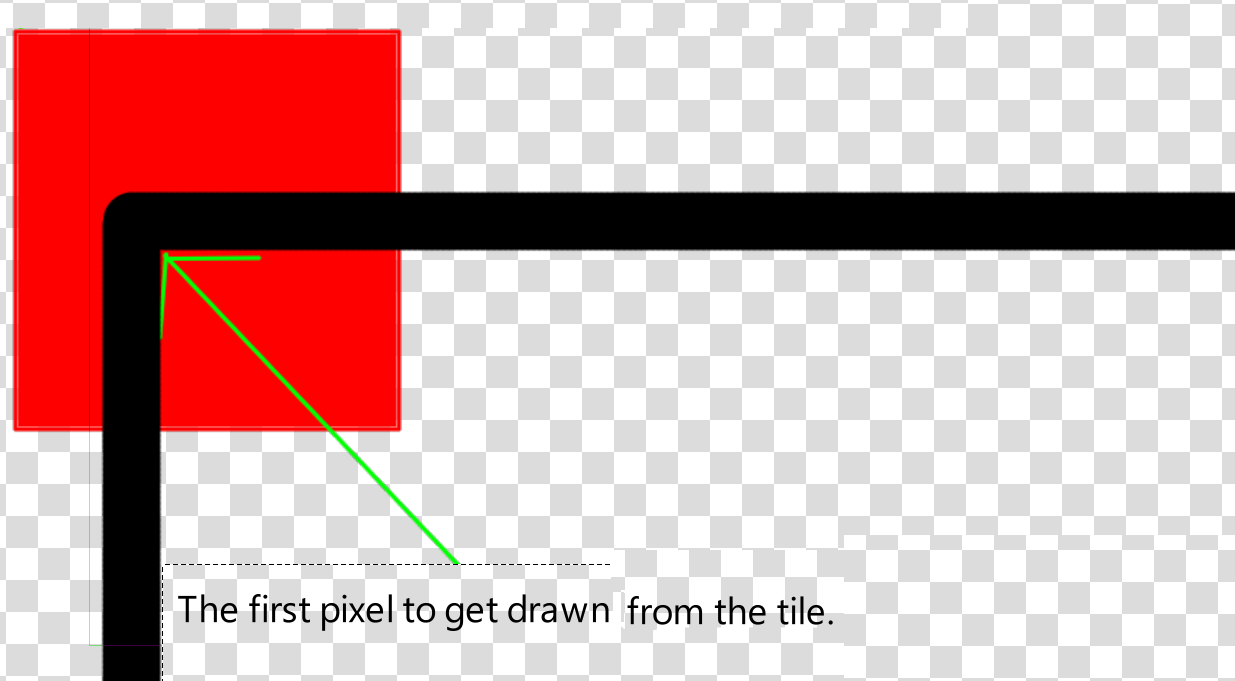
End product
Optimizations and challanges
Here are some things you can try to do on your own:
- Currently we are drawing our tile map every frame, could we somehow store it to a sprite or surface and then draw that clipped to the screen?
- A player sprite would be nice
- World bounds, so you can’t go certain limits
- Making the movement framerate independent, hint use delta time in the formula!
Bye
Ok, I guess that’s it for this tutorial. I hope I sparked your interest, in adding more interesting mechanics and making a 2D platformer. You could also copy a game, so you don’t have to make the game design yourself. For my school project I had to recreate a platformer with some mechanics from Pitfall Mayan Adventure which is an ancient game from the ‘90.
If you want, you could also get some inspiration from my project. You can leave a comment below, about how badly I structured my game project, or any other mechanics that you would like to be explained. Yeah, that’s it, thanks for reading until the very end. Bye!