Learning-Raytracing-in-8-weeks | Simple Smoke with Beer's Law | Part 4
Hello, this is the forth article of an 4 part series where I write down what I’ve learned about Raytracing on the CPU with voxels (which is of course in C++). I have used this template to which I have added features and refactored over the span of the 8 weeks. Here is the overview:
You can see the repo of my raytracer here.
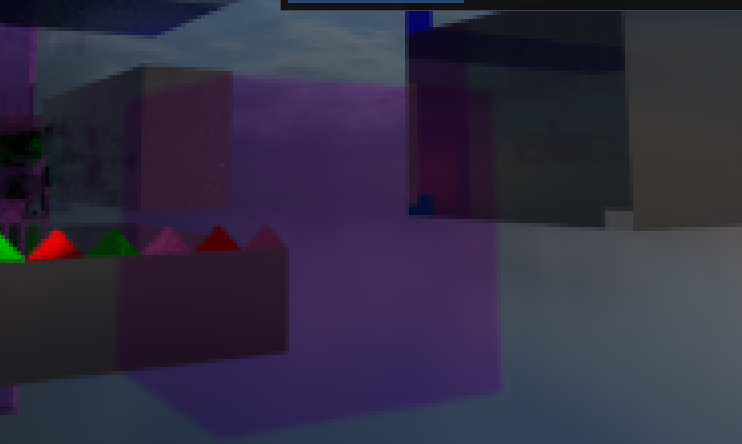
Refraction only glass
If you haven’t read part 2 of this series already, I talked about how one could apply the law of optics to create some pretty realistic glass in a raytracer. The starting point for smoke is glass with refraction only. In code:
1
2
3
4
5
6
7
8
9
10
11
12
13
14
15
16
17
18
19
20
21
22
23
24
25
26
27
28
29
30
31
32
33
34
35
36
37
38
39
40
41
42
  {
    float3 color{1};
    //code for glass
    bool isInGlass = ray.isInsideGlass;
    float IORMaterial = GetRefractivity(ray.indexMaterial); // defaults to 1.45
    //get the IOR based if the ray is inside or outside the glass
    float refractionRatio = isInGlass ? IORMaterial : 1.0f / IORMaterial;
    //we need to get to the next voxel
    if (isInGlass)
    {
      //add color of the glass, maybe expand with Beer Law
      color = GetAlbedo(ray.indexMaterial);
      //transform ray as in the previous tutorial
      Ray backupRay = ray;

      mat4 invMat = voxelVolumes[voxIndex].invMatrix;
      ray.O = TransformPosition(ray.O, invMat);


      ray.D = TransformVector(ray.D, invMat);

      ray.rD = float3(1 / ray.D.x, 1 / ray.D.y, 1 / ray.D.z);
      ray.Dsign = ray.ComputeDsign(ray.D);
      voxelVolumes[voxIndex].FindSmokeExit(ray);
      backupRay.t = ray.t;
      backupRay.CopyToPrevRay(ray);
    }

    float3 resultingDirection = Refract(ray.D, ray.rayNormal, refractionRatio);
    //this is an implementation from Raytracing gems chapter 6: https://www.realtimerendering.com/raytracinggems/unofficial_RayTracingGems_v1.9.pdf
    //this computes the origin of an ray assuring that it is not self-intersecting
    float3 originDirection = OffsetRay(ray.IntersectionPoint(), -ray.rayNormal);
    //we are exiting or entering the glass


    isInGlass = !isInGlass;
    Ray newRay;
    //we need to create a new ray that starts a bit outside or inside the dialectric voxel
    newRay = {originDirection, resultingDirection};
    newRay.isInsideGlass = isInGlass;
    return Trace(newRay, depth - 1) * color;
  }
And in practice it looks like:
Beer’s Law
Mathematically:
\[A = \epsilon \cdot c \cdot l\] \[\begin{align*} &\text{Legend:} \\ &- A: \text{Absorbance} \\ &- \epsilon: \text{Molar absorptivity (extinction coefficient)} \\ &- c: \text{Concentration of the absorbing species} \\ &- l: \text{Path length of the light through the solution} \end{align*}\]Distance is one of the variables used, so let’s start by adding that into the code:
1
2
3
4
5
6
7
8
9
10
11
12
13
14
15
16
17
18
19
20
21
22
23
      float distanceTraveled = 0;
      if (isInGlass)
      {
        //add color of the glass, maybe expand with Beer Law
        color = GetAlbedo(ray.indexMaterial);
        //transform ray as in the previous tutorial
        Ray backupRay = ray;

        mat4 invMat = voxelVolumes[voxIndex].invMatrix;
        ray.O = TransformPosition(ray.O, invMat);


        ray.D = TransformVector(ray.D, invMat);

        ray.rD = float3(1 / ray.D.x, 1 / ray.D.y, 1 / ray.D.z);
        ray.Dsign = ray.ComputeDsign(ray.D);
  //we are going to use this boolean later
        voxelVolumes[voxIndex].FindSmokeExit(ray);
        backupRay.t = ray.t;
        backupRay.CopyToPrevRay(ray);
        distanceTraveled = ray.t;
      }
This is how the ray gets its t value:
1
2
3
4
5
6
7
8
9
10
11
12
13
14
15
16
17
18
19
20
21
22
23
24
25
26
27
28
29
30
31
32
33
34
35
36
37
38
39
40
41
42
43
44
45
46
47
48
49
50
51
52
53
54
55
56
57
58
59

bool Scene::FindSmokeExit(Ray& ray) const
{
  // setup Amanatides & Woo grid traversal
  DDAState s;
  if (!Setup3DDDA(ray, s))
  {
    // proceed with traversal

    return false;
  }
  // start stepping
  while (1)
  {
    const MaterialType::MatType cell = grid[GetVoxel(s.X, s.Y, s.Z)];
    //not smoke basically
    if (cell > MaterialType::SMOKE_PLAYER || cell < MaterialType::SMOKE_LOW_DENSITY)
    {
      ray.t = s.t;

      ray.rayNormal = ray.GetNormalVoxel(worldsize, matrix);
      ray.indexMaterial = cell;
      return true;
    }
    if (s.tmax.x < s.tmax.y)
    {
      if (s.tmax.x < s.tmax.z)
      {
        s.t = s.tmax.x, s.X += s.step.x;
        if (s.X >= gridsize) break;
        s.tmax.x += s.tdelta.x;
      }
      else
      {
        s.t = s.tmax.z, s.Z += s.step.z;
        if (s.Z >= gridsize) break;
        s.tmax.z += s.tdelta.z;
      }
    }
    else
    {
      if (s.tmax.y < s.tmax.z)
      {
        s.t = s.tmax.y, s.Y += s.step.y;
        if (s.Y >= gridsize) break;
        s.tmax.y += s.tdelta.y;
      }
      else
      {
        s.t = s.tmax.z, s.Z += s.step.z;
        if (s.Z >= gridsize) break;
        s.tmax.z += s.tdelta.z;
      }
    }
  }

  ray.t = s.t;
  return false;
}
Very similarly to the logic of the glass, however, getting the t value through the Ray struct is very important this time. Absorption is another real number we need to provide for our material, thus, the code manangin the ray inside the smoke will become:
1
2
3
4
5
6
7
8
9
10
11
12
13
14
15
16
17
18
19
20
21
22
23
 if (isInGlass)
 {
   //add color of the smoke
   color = GetAlbedo(ray.indexMaterial);
   //add the absorption value, ignore the naming, I am repurposing variables from my material implementation
   intensity = GetEmissive(ray.indexMaterial);
   //transform ray as in the previous tutorial
   Ray backupRay = ray;

   mat4 invMat = voxelVolumes[voxIndex].invMatrix;
   ray.O = TransformPosition(ray.O, invMat);


   ray.D = TransformVector(ray.D, invMat);

   ray.rD = float3(1 / ray.D.x, 1 / ray.D.y, 1 / ray.D.z);
   ray.Dsign = ray.ComputeDsign(ray.D);
   voxelVolumes[voxIndex].FindSmokeExit(ray);
   backupRay.t = ray.t;
   backupRay.CopyToPrevRay(ray);
   //get distance
   distanceTraveled = ray.t;
 }
Now we are ready to plug in the equation behind the maths:
1
2
3
4
5
6
7
8
9
10
11
12
13
 float3 Renderer::Absorption(const float3& color, float intensity, float distanceTraveled)
{
  // Combining 'e' and 'c' terms into a single "density" value (stored as intensity in the material).
  // from https://www.flipcode.com/archives/Raytracing_Topics_Techniques-Part_3_Refractions_and_Beers_Law.shtml
  const float3 flipped_color{1.0f - color};
  const float3 exponent{
    -distanceTraveled
    * intensity
    * flipped_color

  };
  return {expf(exponent.x), expf(exponent.y), expf(exponent.z)};
}
Now our material becomes denser if the ray had to travel a bigger distance:

please ignore that nan pixel there
We are nearly done with this smoke material. The only thing that lacks is density. “Raytracing The Next Week” has a brief explanation on that. The simplest version of that I could think of:
1
2
3
4
5
6
7
8
9
10
11
12
13
 //simple density functions, we are going to use the resulting ray to create a new one
 //Random float has the range [0, 1)

 float threshold = RandomFloat() * 100 - intensity;
 if (RandomFloat() * distanceTraveled > threshold)
 {
   //I move the origin of the ray inside the volume, the magic .45f is a hack for making the ray leave the volume faster
   ray.O = ray.O + ray.D * Rand(ray.t * .45f, ray.t);
  //scatter
   ray.D = RandomDirection();
   //start at the origin
   ray.t = 0;
 }
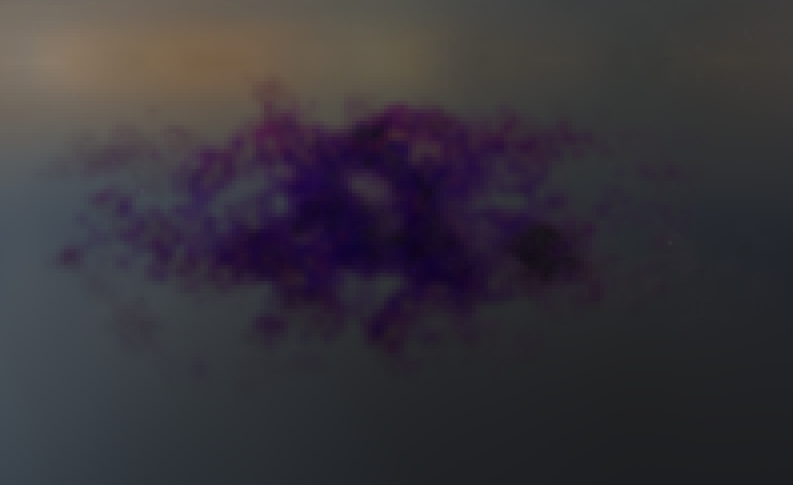
This little code snippet will make the ray move inside the volume and get a random direction, based on how much the distance the ray traveled and how “thick” or dense the cloud is. It might seem a bit magical at first, but some visual explanation goes a long way.
 0.9 density
 2.7 density
 24.7 density
Getting the cloud
After having a decent looking material, we still have to create some kind of cloud shape for our voxels. The answear is unsurprisingly noise, specifically, perlin noise. On top of that, I liked adding various materials of different densities to create the impressions that smoke is more thick towards the center and gradually fades out:
1
2
3
4
5
6
7
8
9
10
11
12
13
14
15
16
17
18
19
20
21
22
23
24
25
26
27
28
29
30
31
32
33
34
35
36
37
38
39
40
41
42
43
44
45
46
47
48
49
50
51
52
53
54
55
56
57
58
59
60
61
62
63
64
65
66
67
68
69
70
71
72
73
74
75
76
void Scene::GenerateSomeSmoke(float frequency = 0.001f)
{
  ResetGrid();
  //from https://github.com/Auburn/FastNoise2/wiki/3:-Getting-started-using-FastNoise2

  const auto fnPerlin = FastNoise::New<FastNoise::Perlin>();

  // Create an array of floats to store the noise output in
  std::vector<float> noiseOutput(gridsize3);
  fnPerlin->GenUniformGrid3D(noiseOutput.data(), 0, 0, 0, worldsize, worldsize, worldsize, frequency, RandomUInt());


  for (uint32_t z = 0; z < worldsize; z++)
  {
    for (uint32_t y = 0; y < worldsize; y++)
    {
      for (uint32_t x = 0; x < worldsize; x++)
      {
        //get noise data
        const float n = noiseOutput[x + y * worldsize + z * worldsize * worldsize];

        MaterialType::MatType color = MaterialType::NONE;

        const float3 point{static_cast<float>(x), static_cast<float>(y), static_cast<float>(z)};

        const float3 center{
          static_cast<float>(worldsize) / 2.0f, static_cast<float>(worldsize) / 2.0f,
          static_cast<float>(worldsize) / 2.0f
        };

        //Elipse like shape, that has the x and z bounds randomized
        const float randomX = worldsize / 2.0f + Rand(-static_cast<float>(worldsize) / 4.0f,
                                                      static_cast<float>(worldsize) / 2.0f);
        const float randomZ = worldsize / 2.0f + Rand(-static_cast<float>(worldsize) / 4.0f,
                                                      static_cast<float>(worldsize) / 2.0f);
        const float3 dimensions{
          randomX, worldsize / 3.0f,
          randomZ
        };

        const float3 distance = (point - center) / (dimensions);
        const float distanceSquared = dot(distance, distance);

        //Denser smoke towards the center
        if (n - distanceSquared < 0.04f || distanceSquared > 1.5f)
        {
          color = MaterialType::NONE;
        }
        //each of these are smoke materials with different densities
        else if (n < 0.3f)
        {
          color = MaterialType::SMOKE_HIGH_DENSITY;
        }
        else if (n < 0.4f)
        {
          color = MaterialType::SMOKE_MID2_DENSITY;
        }
        else if (n < 0.6f)
        {
          color = MaterialType::SMOKE_MID_DENSITY;
        }
        else if (n < 0.7f)
        {
          color = MaterialType::SMOKE_LOW2_DENSITY;
        }
        else if (n < 1.0f)
        {
          color = MaterialType::SMOKE_LOW_DENSITY;
        }


        Set(x, y, z, color); //plot the color
      }
    }
  }
}
You might need to figure out the right frequency for voxel resolution. Here is mine with 64^3 voxels:
 perlin noise of 0.163
If you wonder “why the black parts?”, it is the bounds limit of the ray, increase it and it will probably go away. Alternatively, you could change the return color if the maximum depth is reached to see if it is actually happening because of the low limit.
DOF
Now to really sell this simple cloud, we need some depth of field, DOF for short. In raytracing this is trivially implemented like so:
1
2
3
4
5
6
7
8
9
10
11
12
13
14
15
16
17
18
//generate primary rays
    Ray GetPrimaryRay(const float x, const float y) const
    {
      //conceptually used https://youtu.be/Qz0KTGYJtUk?si=9en1nLsgxqQyoGW2&t=2113
      const float u = x * (1.0f / SCRWIDTH);
      const float v = y * (1.0f / SCRHEIGHT);
   //go through the virtual screen
      const float3 P = topLeft + u * (topRight - topLeft) + v * (bottomLeft - topLeft);
      //defocusJitter is the amount of jitter we want to add to the focal point
      const float2 jitter = RandomPointInCircle() * defocusJitter / SCRWIDTH;

      const float3 focalPoint = camPos + focalDistance * normalize(P - camPos);

      const float3 rayOrigin = camPos + jitter.x * right + jitter.y * up;
      const float3 rayDirection = (focalPoint - rayOrigin);
   //creates a ray
      return {rayOrigin, rayDirection};
    }
 Isn’t that a convincing looking cloud?
Thanks for reading my article. If you have any feedback or questions, please feel free to share them in the comments or email me.
![]()