Making a Grand Strategy Map Editor Plugin for Godot in C++
In this article I will cover how I implemented the border rendering, and the possible improvements or future work one might be interested in.
The project is open source, you can access the repo by clicking here.
Intro
Border generation grand strategy games may be one of the most interesting subjects that I approached so far. There is parsing to be done and tooling to modify and read the game data, then using shader magic, we get “border gore”. The combination between the two makes for a varied challenge. I read a few posts on the online forums: very_old_epic_thread, simulating_eu4, game_dev_exchange and adventured into the subject with much zeal.
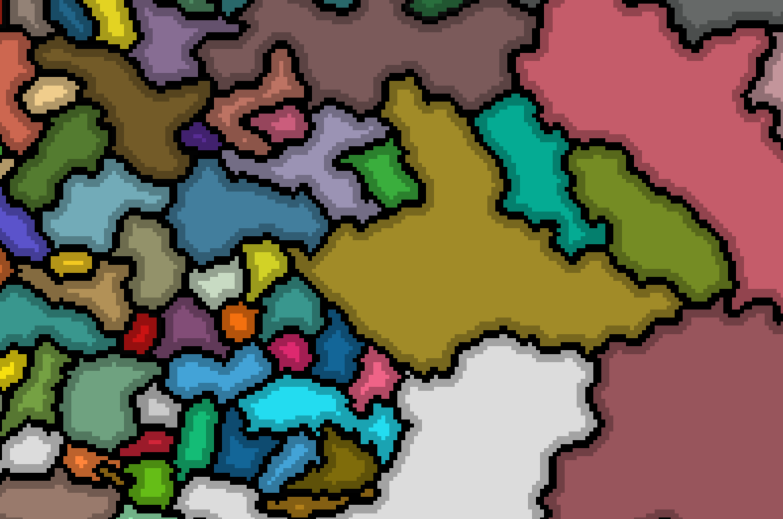
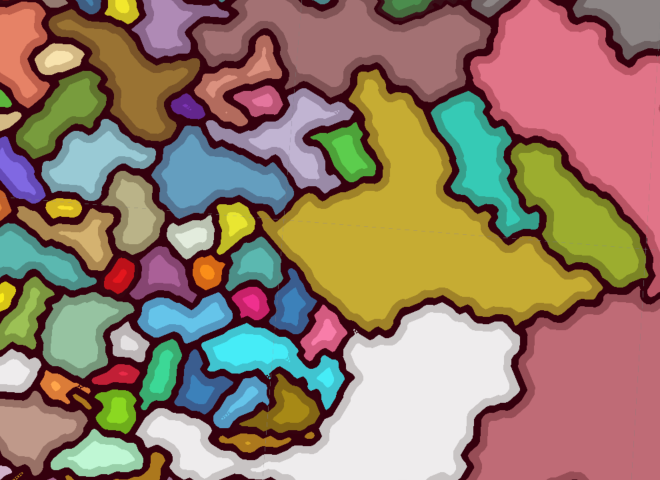
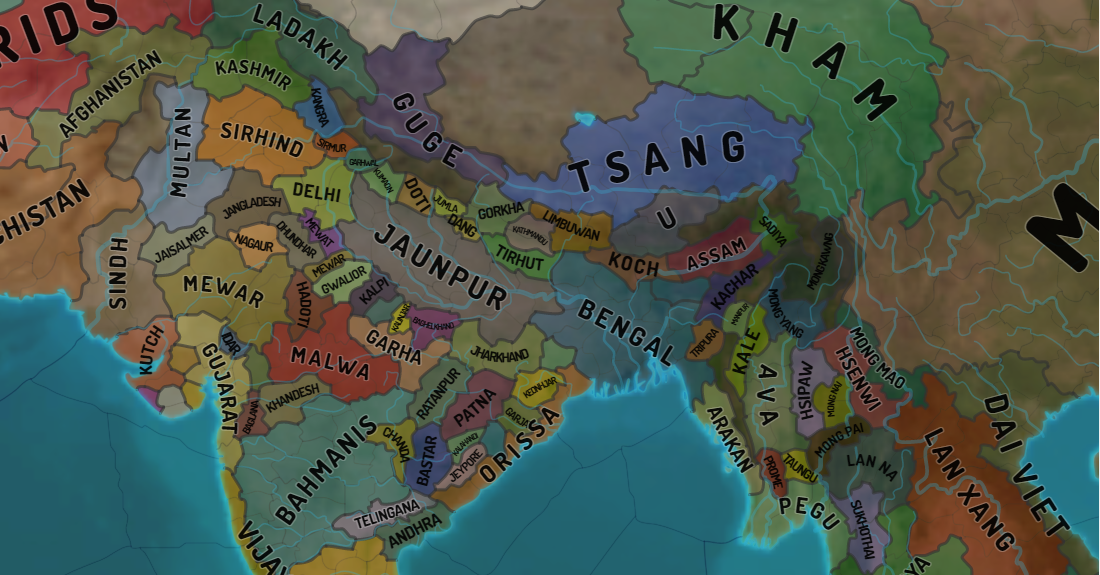
I started this project around the time that Paradox was already posting videos with the new content of Europa Universalis 5 (EU5). Below are a few references from Paradox games:
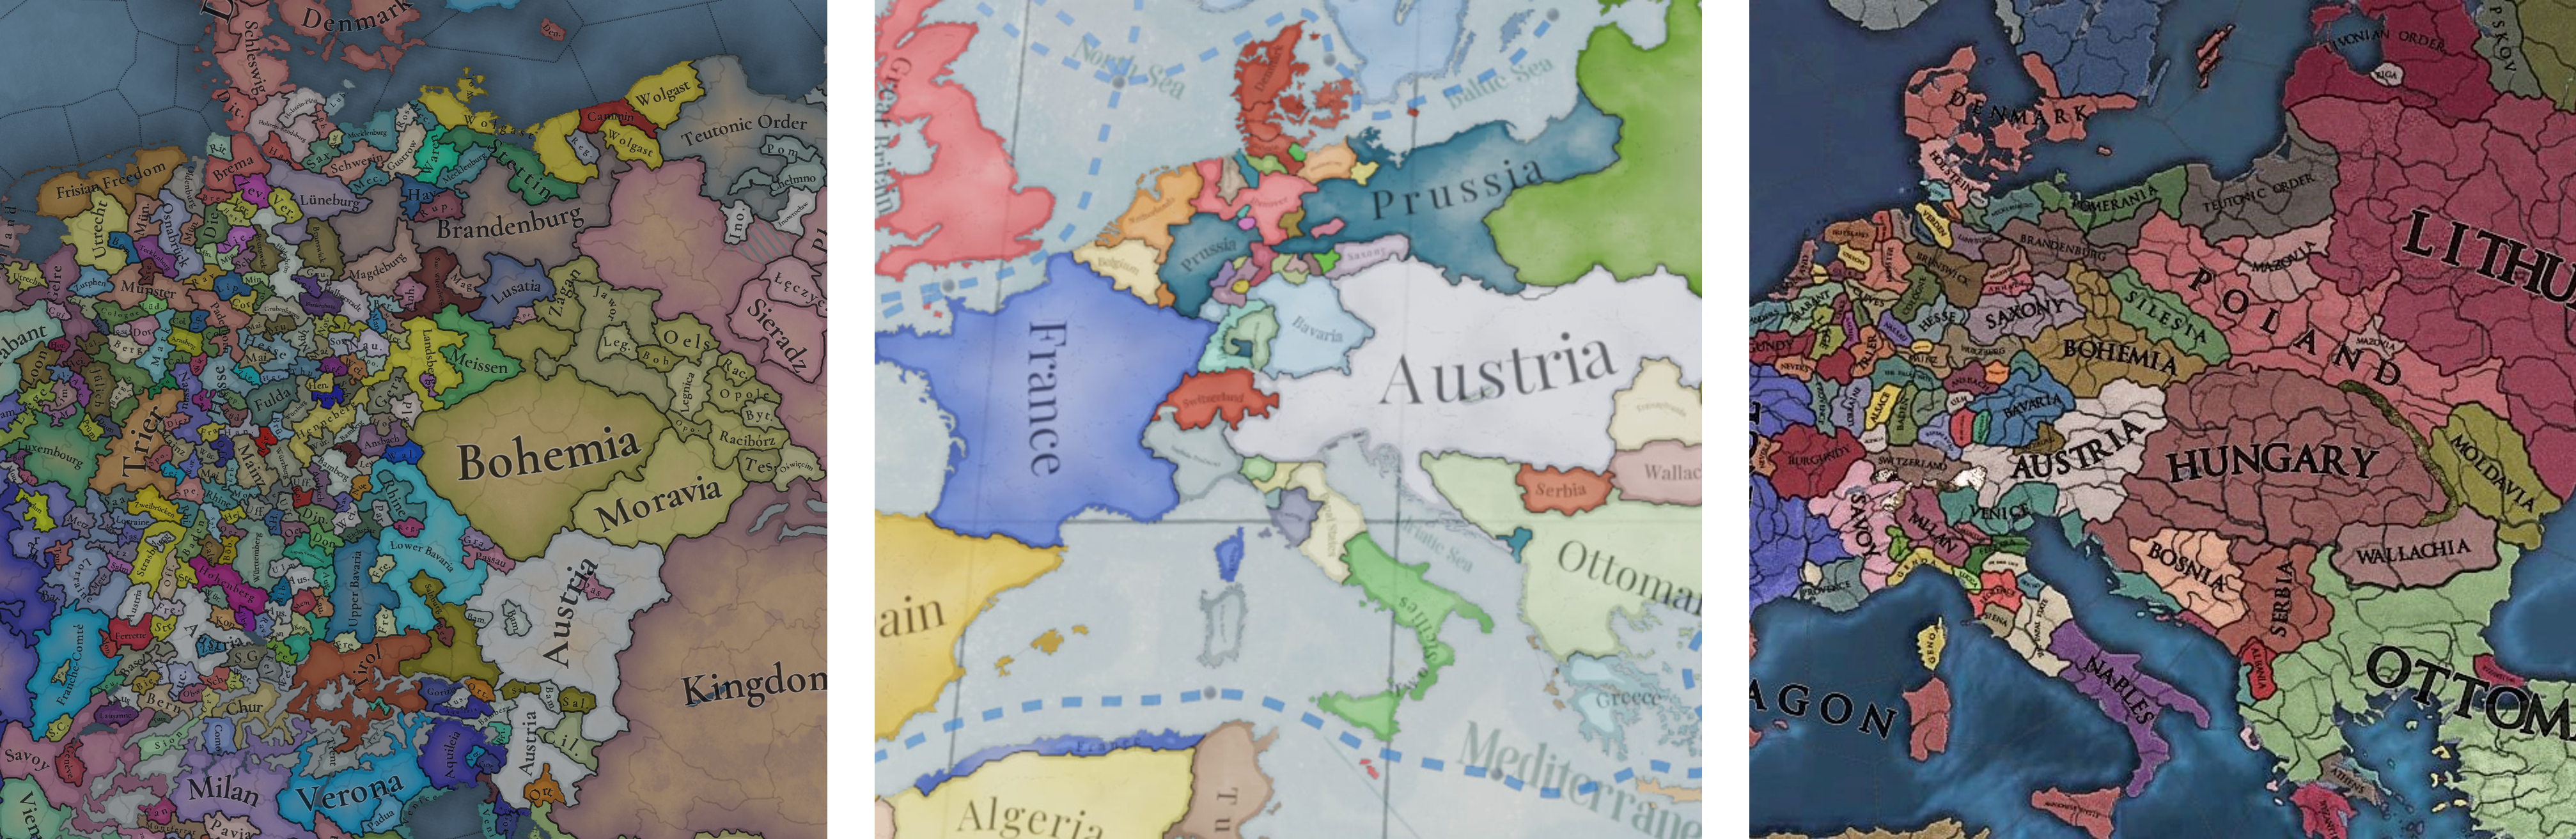 From left to right: Europa Universalis 5 (EU5), Victoria 3 and EU4
The image from EU4 is using this mod.
I believe the most peculiar aspect is that grand strategy games always have a runtime component: the maps you see above will change drastically over the course of one game and it will differ dramatically between runs. The map itself has a very dynamic appearance, despite the irony of being static once the player presses the “pause” button.
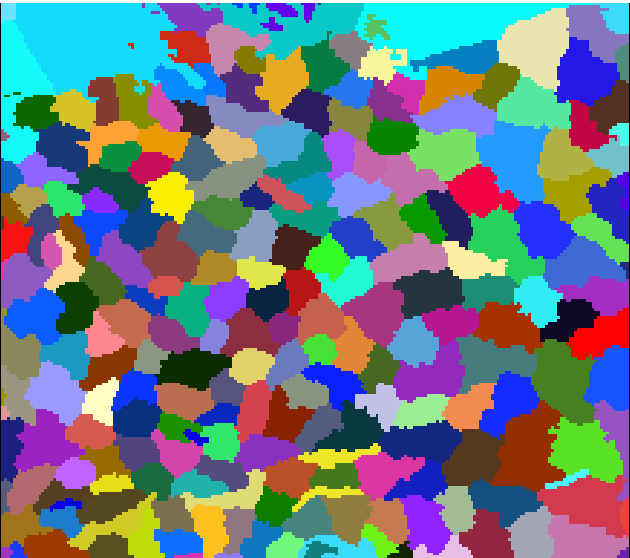
I own Europa Universalis 4, therefore, it is not surprising that it will have similarities with the rightmost render. EU4 uses a province map to keep track of each province.
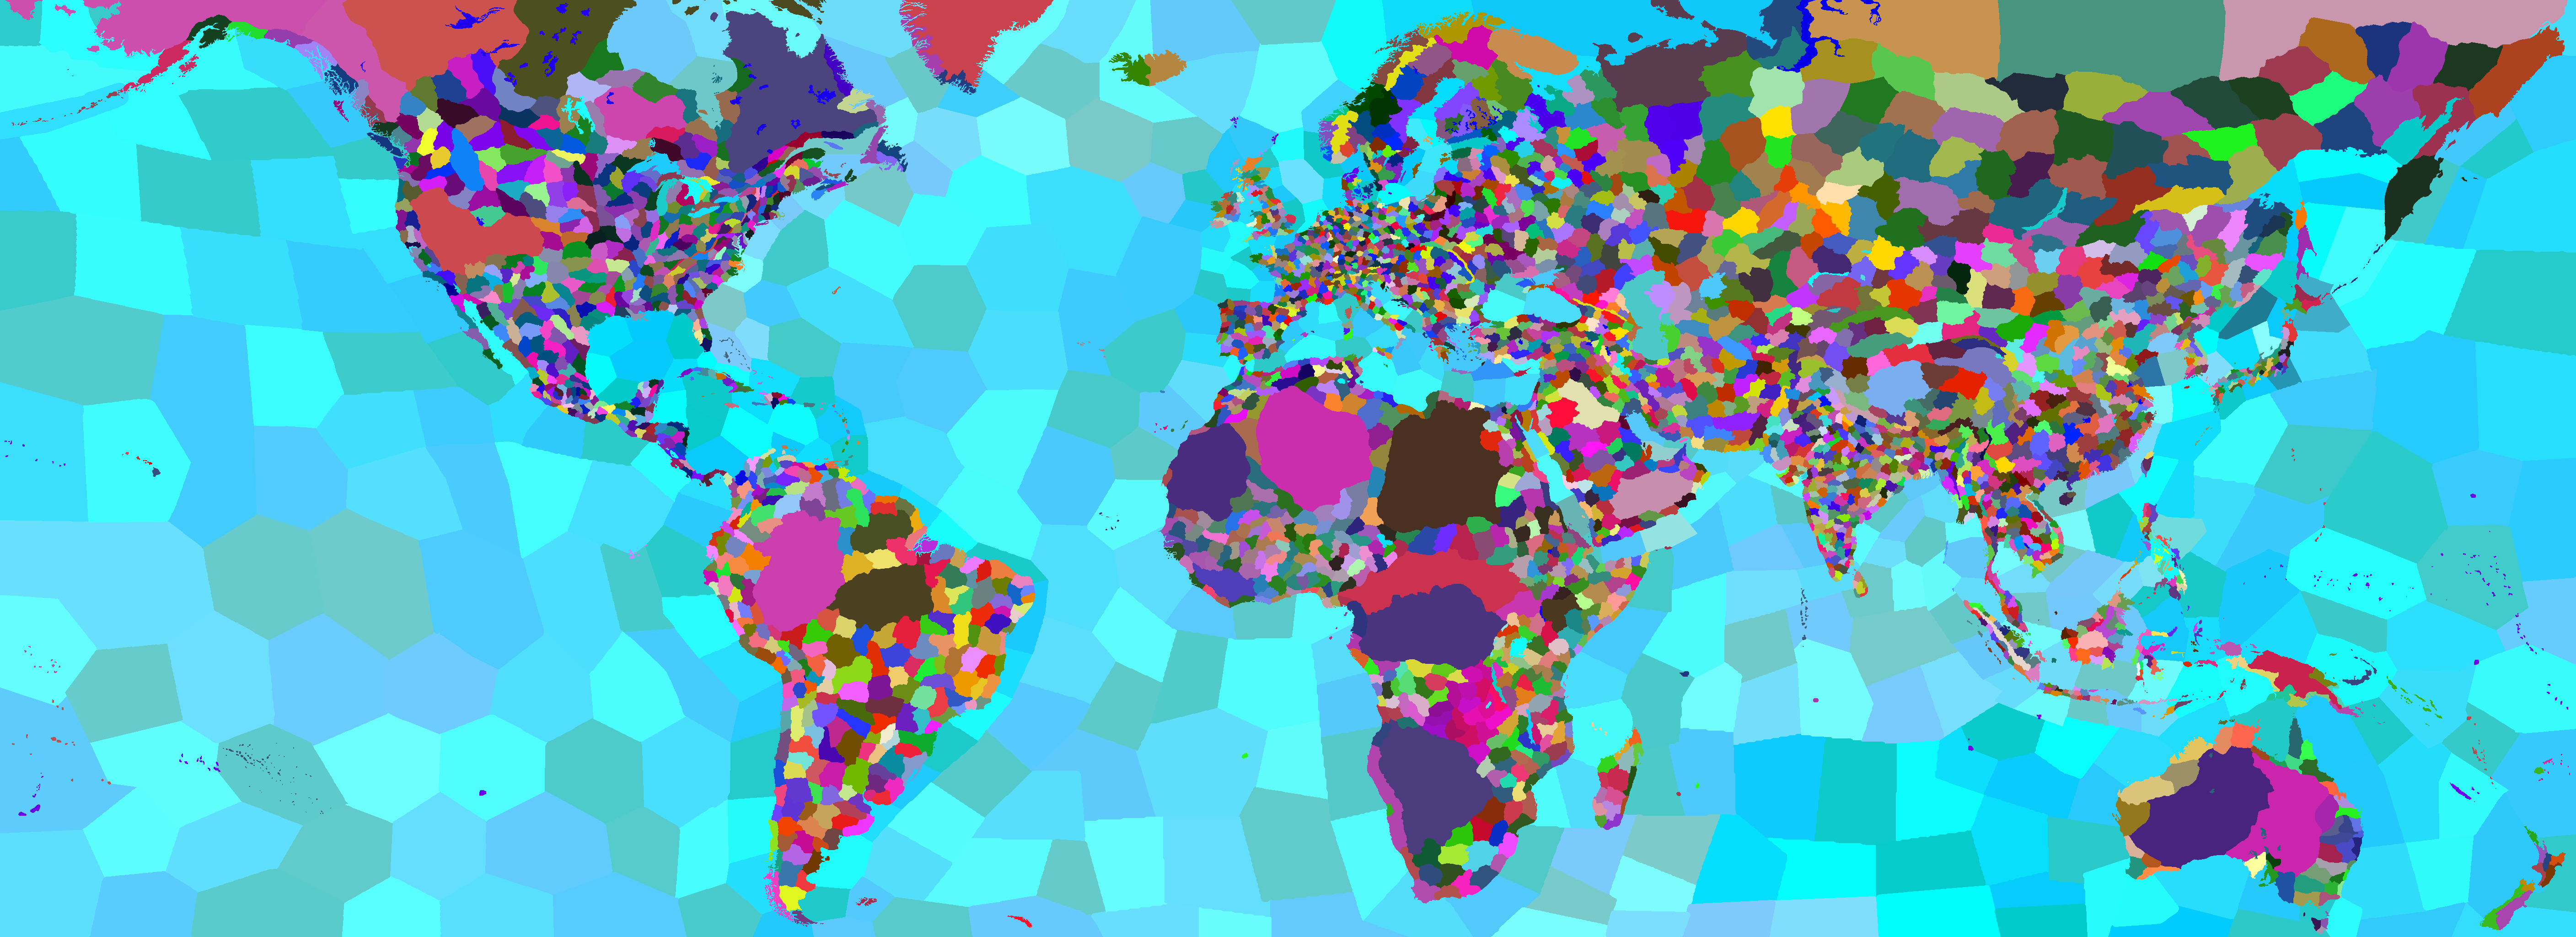 Province map from EU4
Results from my project
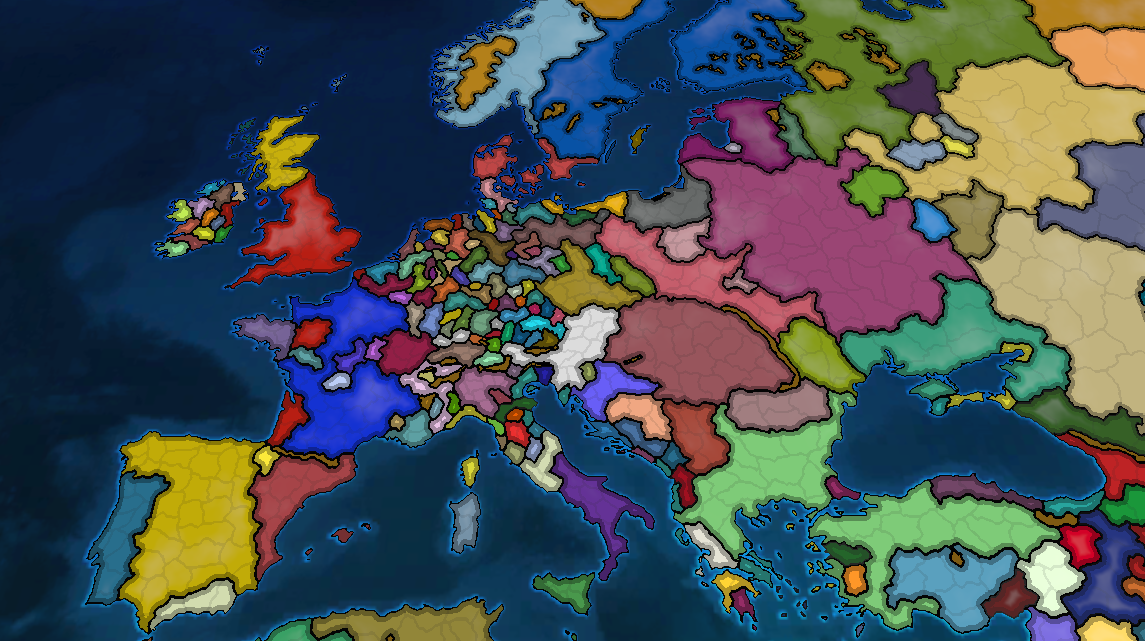 Country borders and province borders with mask applied
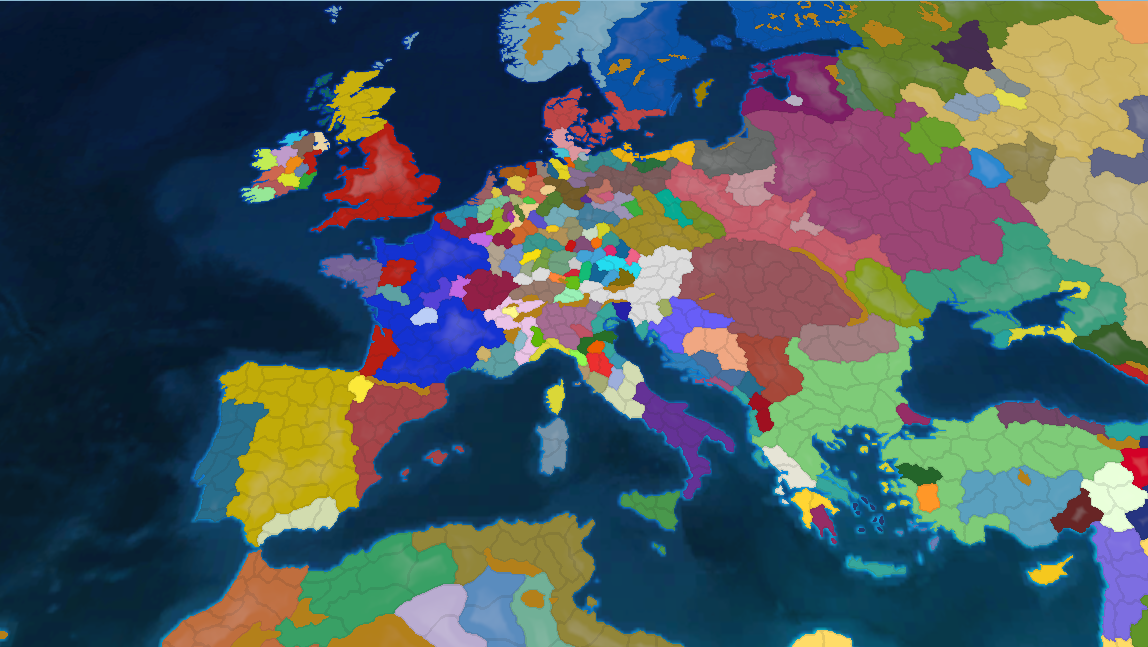 No country borders and province borders with mask applied
Here are a few screenshots more zoomed in, so it is easier to see the limitations of the technique (artifacts): 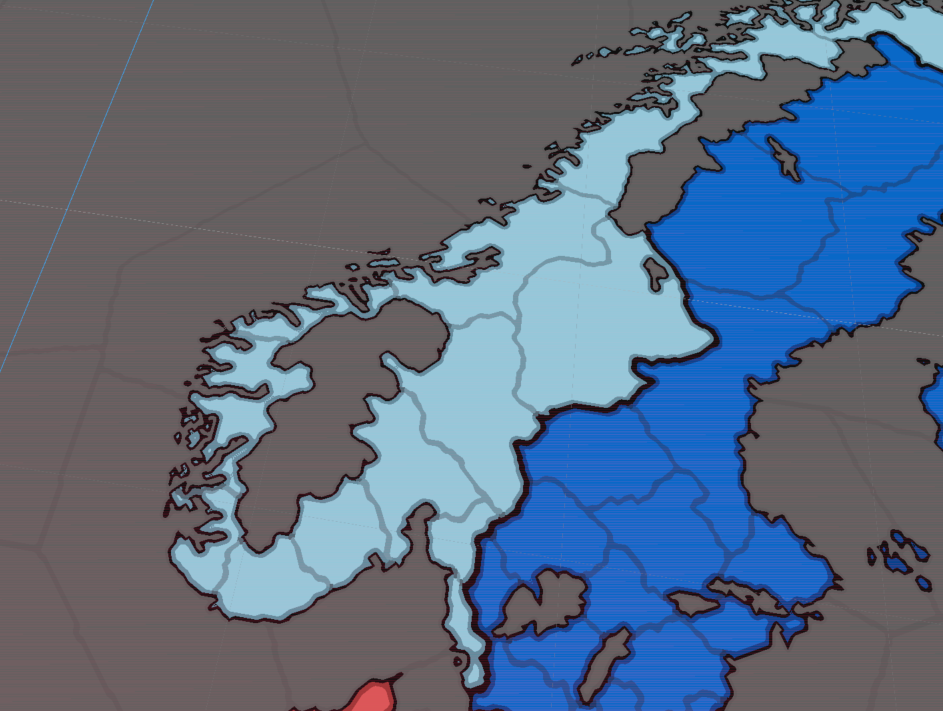 Norway
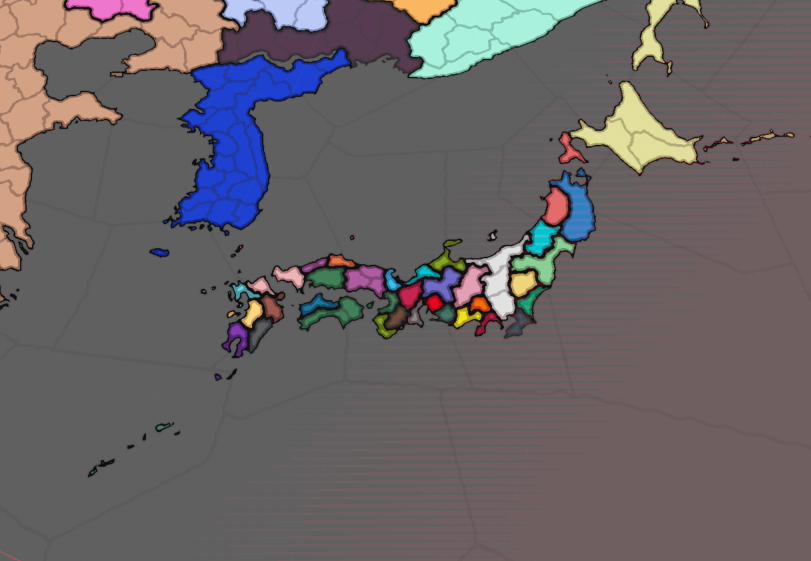 Japan
Japan
 Brazil
Runtime demo
Shows how the project would work in a game
Gdextension in Godot with C++
GDextension is a way to extend the Godot engine that still allows very easy distribution via their plugin store.
There are a lot of resources on how to work with GDextension that I will link below.
The repo helped me set my project up with Visual Studio Code which I wanted to learn how to use, as it is faster than Visual Studio
Suffice to say that, coding in C++ plugins is faster to run, but definitely not faster to write than in GDscript (Godot’s scripting language).
Another important aspect is that I am only using compute shaders for generating the color_lookup and color_map at the beginning of the application. The rest is implemented using SubViewports in Godot, which is not the best way to do it, but it allowed me to experiment faster than I could have using compute shaders.
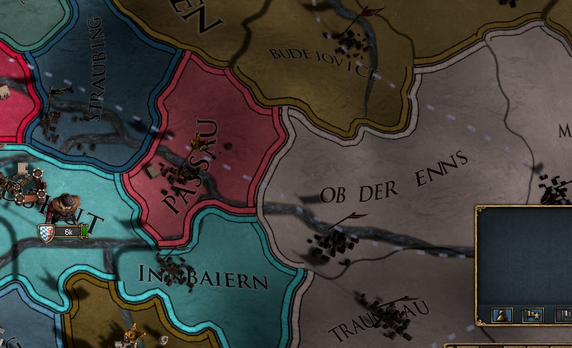
Rendering provinces using the paper on Imperator: Rome
There are relatively few resources available online about Grand Strategy games. One that I found very useful is Optimized Gradient Border Rendering in Imperator: Rome. Although the paper’s title relates to performance, the prerequisites for optimization outline how to render gradients for the countries.
The fact that the paper is only explaining the algorithm for gradients and does not touch the topic of borders is a limitation of the technique I use. I will suggest a vector based approach at the end of the article.
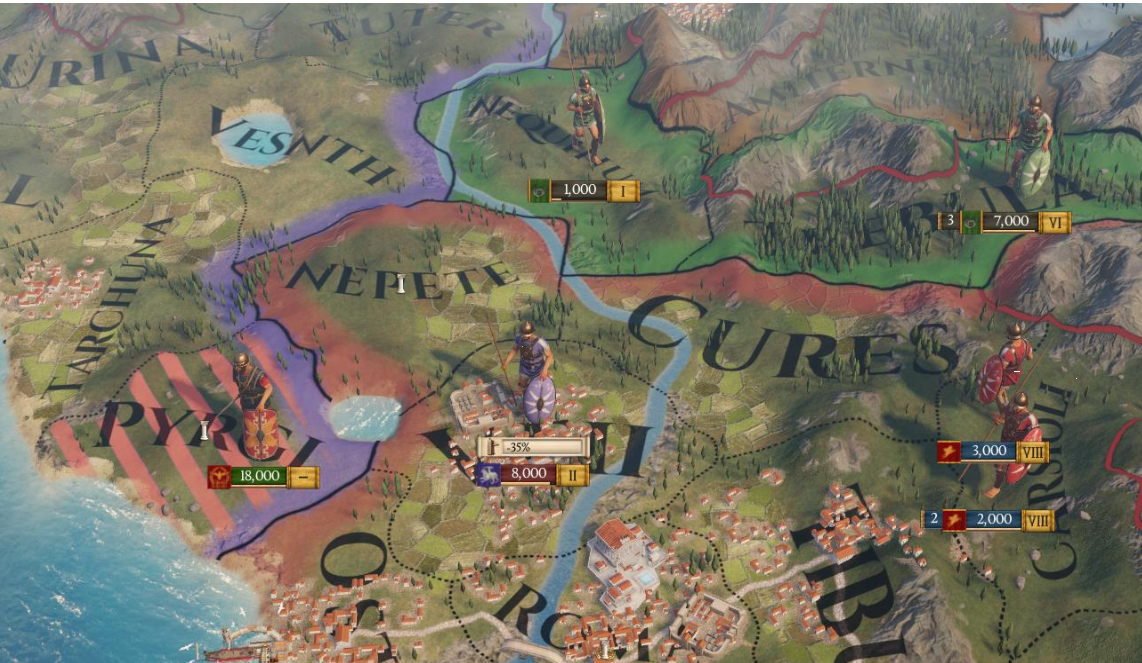 Screenshot from Imperator: Rome
I will introduce a few terms from the paper, as it makes the explanation easier to grasp:
Color Mapis a small texture (256x256) that contains the color that a province should haveColor Lookupis a texture with two channels that contain UV coordinates for theColor Map
The Color Map can be thought of as an array of colors that are in the same order of the provinces. To illustrate my point, below I show a very zoomed in color map.
Note that, the first pixel is empty to keep it simple. The first province starts from the the second pixel with ID 1.
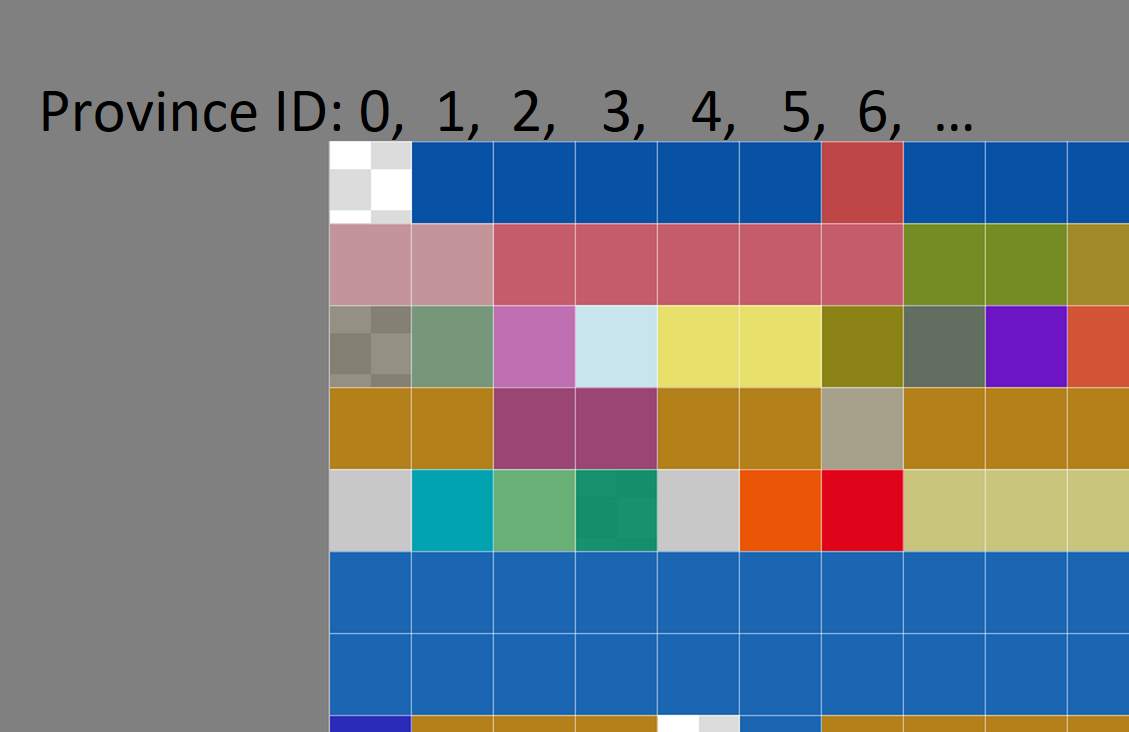 Color map with the few first province IDs
The first few provinces are mapped as follows:
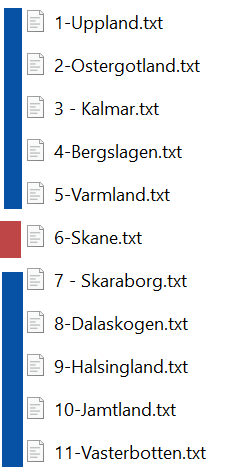 List of province pairs ID - Name, with their country color on the left
Here the first few provinces are colored blue, since they are owned by Sweden. The 6th province is owned by Denmark, so color reflects that.
To know the initial state of the map, we can parse each of the province files. This is how I formed a database, where each country has a color associated with it and each province is associated with a country.
I recommend taking a look at the C++ code I wrote for parsing various data from the files. This post focuses more on the graphics side.
There is a lot of gameplay related information, however, just to render a simple political map, we only need to find the token “owner=”. There we will find a 3 letter ID. Here you can see SWE, which is the short name for Sweden.
Below, is one of the files that defines which provinces are owned by countries.
1
2
3
4
5
6
7
8
9
10
11
12
13
14
15
16
17
18
19
20
21
22
23
24
25
26
27
28
29
30
31
32
33
34
35
36
37
38
39
40
41
42
43
44
45
#Uppland, contains Stockholm, Uppsala & Nyk�ping.

add_core = SWE
# ------------------
# This is relevant for our use case
owner = SWE
# ------------------

controller = SWE
culture = swedish
religion = catholic
hre = no
base_tax = 5
base_production = 5
trade_goods = grain
base_manpower = 3
capital = "Stockholm"
is_city = yes
discovered_by = eastern
discovered_by = western
discovered_by = muslim
discovered_by = ottoman
extra_cost = 16
center_of_trade = 2


1436.4.28 = { revolt = { type = pretender_rebels size = 1 leader = "Karl Knutsson Bonde" } controller = REB add_base_tax = 1 } # Karl Knutsson Bonde marsh on Stockholm
1438.3.6 = { revolt = {} controller = SWE } # Unclear date
1438.10.1 = { revolt = { type = pretender_rebels size = 1 leader = "Karl Knutsson Bonde" } controller = REB } # Unclear date
1440.9.1 = { revolt = {} controller = SWE } # Christopher III elected Union King
1444.11.12 = { add_base_tax = 2 }
1448.6.20 = { revolt = {} controller = SWE } # Karl VIII is elected king of Sweden
1501.8.1 = { controller = DAN } # Danish loyalists at Swedish DoW and breaking of vassalage
1502.5.9 = { controller = SWE } # Retaken by Sweden
1523.6.7 = { base_manpower = 4 } # Kgl.Drabantk�ren/Svea Livgarde
1527.6.1 = {
 religion = protestant
 reformation_center = protestant
}
1598.8.12 = { controller = PLC } # Sigismund tries to reconquer his crown
1598.12.15 = { controller = SWE } # Duke Karl get it back
1617.1.1 = {
 base_tax = 6
 base_production = 6
} # Stockholm become Baltic Metropol
You can find all the text files I used in my project here.
I will refer to a Political Map as the output of these two textures. Below is a diagram with an overview of the whole process:

Diagram with the overview of the process
The algorithm for simple rendering of colors can be summarized as follows:
- From
Province Mapgenerate a lookup texture at the beginning - Parse the province and country data files
- Associate each province with its country color
- Create
Color Maptexture from the data in step 3 - Render the final result
Below is a short snippet that gets the province color from the two textures.
1
2
3
4
5
6
7
8
9
uniform sampler2D lookup_map : filter_nearest;
uniform sampler2D color_map : source_color, filter_nearest;

vec4 get_province_color(vec2 uv)
{
 vec4 lookup = texture(lookup_map, uv);
 vec2 province_id = lookup.rg;
 return texture(color_map, color_uv);
}
It is important to understand here, that this indirection is used, because the smaller texture can be modified easily and efficiently at runtime.
 Very simple political map that only outputs each province’s color
Distance Fields - Jump Flood Algorithm (and how to not implement it)
Signed Distance Fields(SDF) are a common technique used in game development to create various graphics effects which can be seen in this paper from Valve. In the most simple case, one can generate an SDF as a 8 bit one channel texture. The brute force version of this algorithm is to check each texel’s neighbors using a “spread” variable. As you can imagine, 0 will represent the smallest distance and 1 will be the maximum distance.
This is an Unsigned Distance field, since the borders cannot have a negative distance.
Historically, this technique was first used for font rendering, to maintain crisp UI elements. However, we are using it to create a border, as well as a gradient between country colors. Therefore, the code needs to be adapted accordingly. Below is the simplest (and slowest) shader code:
1
2
3
4
5
6
7
8
9
10
11
12
13
14
15
16
17
18
19
20
21
22
23
24
25
26
27
28
29

void fragment()
{
	vec2 uv = UV;
	vec4 center_color = get_province_color(uv);
	vec2 pixel_size = 1.0 / vec2(textureSize(lookup_map, 0));
	float min_distance = max_distance;
	bool found_edge = false;
	int spread = int(max_distance);

	for (int x = -spread; x <= spread; x++)
	{
		for (int y = -spread; y <= spread; y++)
		{
			vec2 offset = vec2(float(x), float(y));
			vec2 sample_uv = uv + offset * pixel_size;
			vec4 sample_color = get_province_color(sample_uv);

			if (sample_color != center_color)
			{
				float dist = length(offset);
				min_distance = min(min_distance, dist);
			}
		}
	}

	float normalized_distance = min_distance / max_distance;
	COLOR = vec4(vec3(normalized_distance), 1.0);
}
 Resulting Distance field
At this point we can already render a pixelated map with a gradient and borders.
1
2
3
4
5
6
7
8
9
10
11
12
13
14
15
16
17
18
19
20
21
22
23
24
25
26
27
28
29
30
31
bool colors_equal(vec4 a, vec4 b)
{
	return all(lessThan(abs(a - b), vec4(EPSILON)));
}

void fragment()
{
	vec2 uv = UV;
	float df = texture(country_distance_field, UV).r;
	float df_province = texture(province_distance_field, UV).r;

	vec4 province_color = get_province_color(uv);

	float gradient_factor = smoothstep(edge_threshold - edge_smoothness,
			edge_threshold + edge_smoothness,
			df);


	vec3 final_color = mix(border_color.rgb, province_color.rgb, gradient_factor);

	final_color = mix(province_color.rgb, final_color, gradient_strength);
	// the sdf value becomes a border at a certain threshold
	if (df < edge_size)
	{
		final_color = border_color.rgb;
	}
	vec4 output = vec4(final_color.rgb, province_color.a);

	COLOR = output;

}
 Output of the previous shader
The output is pixelated. While for pixel art styles this might be good enough, most developers would need a smoother result for making their maps exactly how they want. Feel free to skip to the upscaling chapter, if you don’t need a faster SDF generation.
How to not do the Jump Flood Algorithm
JFA has a complexity of O(log n). It is useful in the context of a simulated environment where each country is fighting wars, their provinces changing several times a frame. In other, words, you can safely skip this part. The JFA itself is quite simple to implement, however, I think it is worth spending some time to understand it thoroughly. Ben Golus has an article exploring the performance of this algorithm for outlines on 3D models. I will not explain the algorithm, since there are plenty of resources:
- shadertoy
- article on voronoi diagrams and distance field: https://blog.demofox.org/2016/02/29/fast-voronoi-diagrams-and-distance-dield-textures-on-the-gpu-with-the-jump-flooding-algorithm/]
- paper on jfa
Below I did a quick experiment in Godot using SubViewports which can be thought of as Render Textures from other engines.
Nyan cat outline with the Jump Flood Algorithm
A problem I encountered here is twofold:
SubViewportsprovide less flexibility for the programmer compared to a compute shader. They are very easy to test and can be run from the editor. However, I believe it is safer to implement the algorithm in compute shaders at least in the Godot engine (version 4.4).- Earlier I mentioned that the paper explains how to create the gradients, not the borders. However, the JFA algorithm needs a “seed” image with the borders. I was unable to use the previously mentioned approach to create good enough results. The naive approach detects if a pixel is a border by checking the color of neighboring pixels.
I believe that using compute shaders or calculating the borders using a vector based approach might yield good results.
Upscaling using HQX shaders
The HQX shader is used to make the image look like it is at a higher resolution. It has been been implemented in godot here or in Unreal Engine(check the description of the video for the code). You can check the shadertoy to have an interactive experience with the shader.
 Upscaled result using HQX
Clearly, this approach is not perfect, especially when the camera is zoomed enough you can clearly see artifacts: 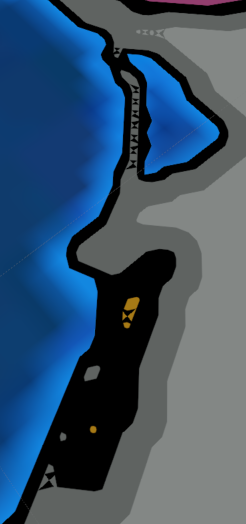 Upscaling artifacts
However, this might be fine for a wide range of applications that involve looking at a grand strategy map from a medium distance.
Future work: vector based borders
I will warn you from the start, that I have not implemented this technique yet. EU4 might use something similar, and it is known for a fact that they generate meshes for some of the borders they display, along with the vector style borders between provinces that are owned by the same country:
 EU4 creates border meshes with its province neighbors
oikoumene is an open source project using Scala, that generates an impressive looking map as a .svg! They have a page dedicated to the explanation of the algorithm they use. The gist of the approach is to use the province map that we saw earlier to create the shape of the borders by tracing the border segments in various passes.
 SVG from oikoumene samples
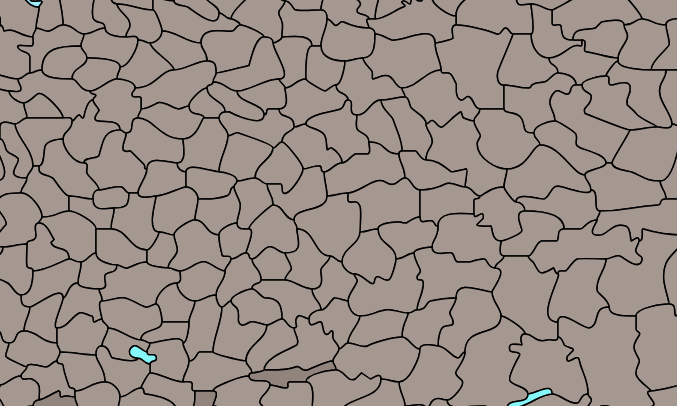
 Original province map, approximately the same region as the screenshot below
 Province borders from oikoumene
I think this approach looks amazing and I will keep you updated when I finally have a similar project as the one above. The JFA algorithm would also benefit, resulting in a much better SDF output for the map gradients.
References
Papers
Intel Paper - Optimized Gradient Border Rendering in Imperator: Rome Valve SDF Paper - Improved Alpha-Tested Magnification for Vector Textures Jump Flooding Algorithm Paper
Blog Posts & Articles
Simulating the EU4 Map in the Browser with WebGL
The Quest for Very Wide Outlines
Fast Voronoi Diagrams and Distance Field Textures on the GPU With the Jump Flooding Algorithm
Code Examples & Demos
EU4 SVG Map Repository (GitHub)
Forums
Unreal Engine Forum - Borders Like Paradox Grand Strategy Game
Game Dev Stack Exchange - Answer on Border Rendering
Documentation
Godot - Using Viewport as Texture
Final Words
I made this article based on a self study project I did as a third year programmer at Breda University of Applied Sciences for the Creative Media and Game Technologies bachelor. Thanks for reading my article. If you have any feedback or questions, please feel free to email me.